When you've drawn a Sierra permit that requires an approved bear canister—Mt. Whitney, the John Muir Trail, Rae Lakes Loop, anywhere in Sequoia-Kings Canyon or Yosemite's high country—knowing how to pack backpack with bear canister sierra style is the difference between a balanced 30-mile day and a backache by mile six. The canister goes vertically in the middle of your pack, surrounded by soft gear, with food rotated to the top for trail-day access. Pack weight sits between your shoulder blades and hips, hugging the spine. This 2026 guide walks you through the exact load order, gear pairings, and ranger-approved technique.
Why the Sierra requires bear canisters in 2026
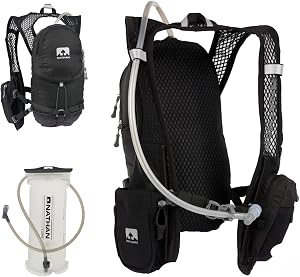
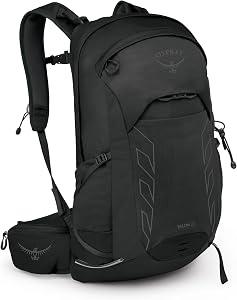
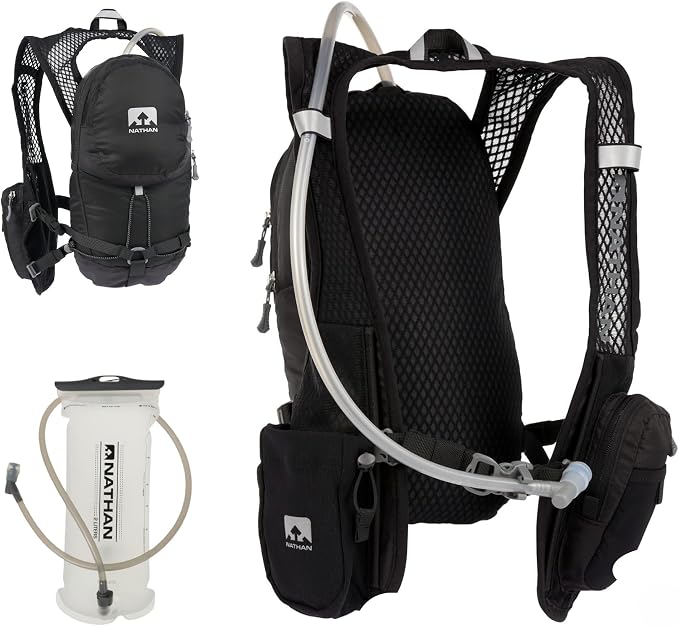
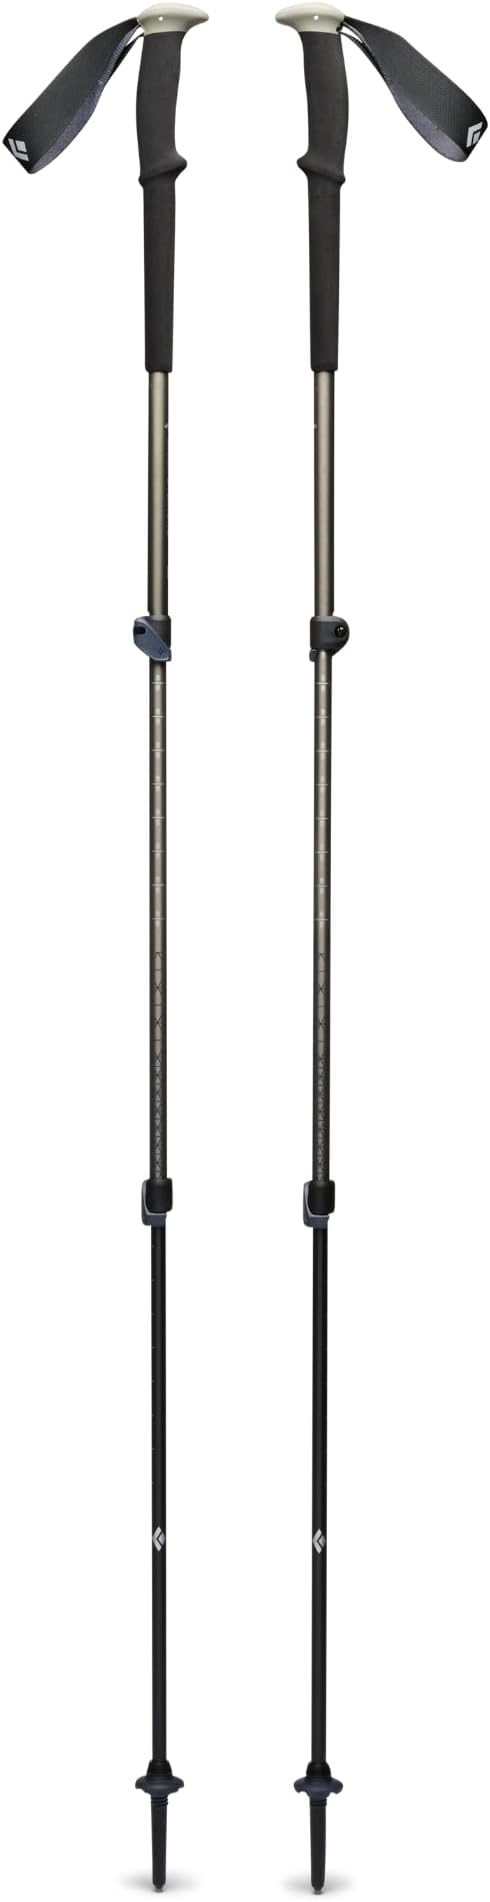
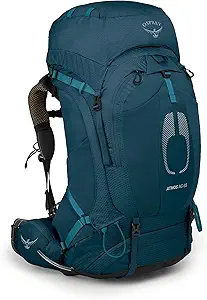
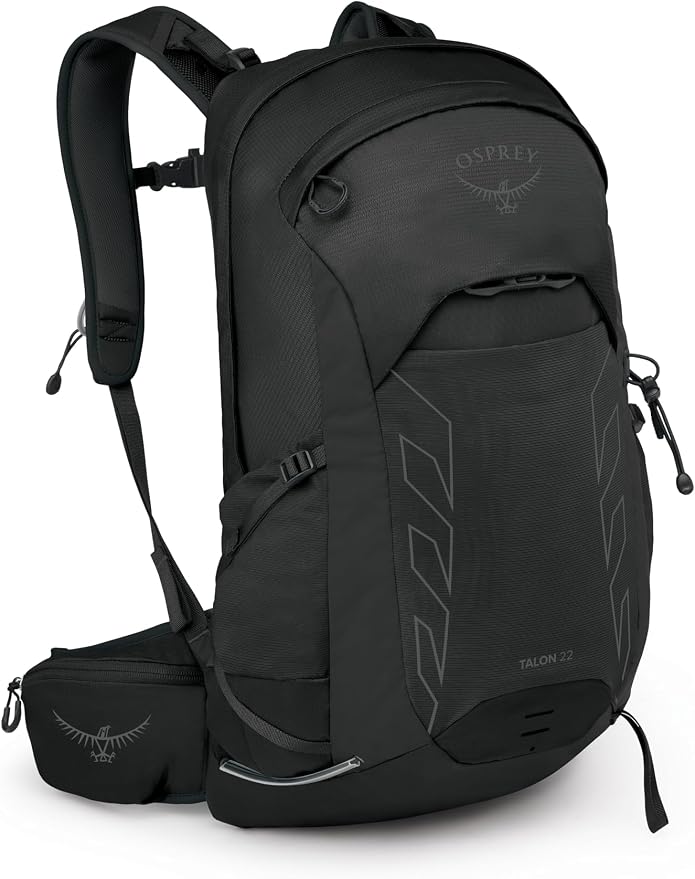
Top Picks
The 2026 wilderness regulations across Yosemite, Sequoia-Kings Canyon, Inyo National Forest, and the Ansel Adams Wilderness mandate an approved hard-sided bear-resistant food container for all overnight trips above roughly 8,000 feet and throughout the JMT corridor. Rangers check at the trailhead and on random patrols. Black bears in these basins are clever—Yosemite alone documented 28 successful food raids on hung bags between 2023 and 2025—so an IGBC-approved canister is no longer optional gear. The common models are the Garcia Backpacker (cheap rental at Whitney Portal and Lone Pine), the BearVault BV475 and BV500, the Bearikade Weekender (rented from Wild Ideas), and the BV425 Sprint for ultralight thru-hikers. Knowing which canister you're packing matters: the BV500 is 12.7 inches tall and 8.7 inches in diameter, while the Garcia is shorter and squatter at 12 by 8.8. Both fit vertically or horizontally in most 60–75L packs, but technique differs.
The right backpack size for a bear canister Sierra trip
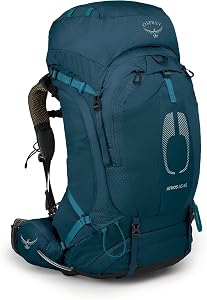
For a 5–10 day Sierra trip with a bear canister, the sweet spot is a 60–75 liter pack rated for 35–45 pounds. Anything smaller than 55L forces you to strap the canister externally, which throws your balance off on Forester Pass switchbacks and the Glen Pass exposed traverse. Anything over 80L tempts you to overpack, and a week of food already weighs plenty. Look for a pack with a vertical main compartment (top-loader, no internal divider), a sleeping-bag zipper at the bottom, and dual ice-axe loops you can repurpose for trekking poles. The Osprey Atmos AG 65, Gregory Baltoro 65, and Hyperlite Mountain Gear Southwest 70 are all canister-friendly options selling in 2026.
How to pack backpack with bear canister sierra: the exact load order
The fundamental rule: heavy items live close to your spine, between your shoulder blades and lumbar. Light, bulky items go to the extremes. The bear canister is your single heaviest item once loaded with food—8 to 14 pounds depending on trip length—so it dictates everything else. Here is the layer-by-layer load order JMT veterans and Inyo backcountry rangers consistently recommend.
Layer 1 — Bottom of pack: Sleeping bag in its compression sack, camp shoes or Crocs, sleeping clothes. These are camp-only items. If your pack has a sleeping-bag zipper, this gives you fast access without unpacking everything.
Layer 2 — Middle, against your back: The bear canister, oriented vertically. Vertical orientation pulls the weight tight against your lumbar curve. Wedge the inflated sleeping pad (folded or rolled) between the canister and the back panel for a cushion that doubles as insulation against the cold canister wall.
Layer 3 — Around the canister: Tent body, fly, and footprint stuffed into the spaces on either side of the canister. Soft, compressible clothing—down puffy, rain pants, base layers—fills the gaps. You're building a cylinder of soft gear that hugs the canister and stops it from shifting.
Layer 4 — Top of pack: Your day-use food bag (snacks, lunch, electrolytes pulled from the canister at breakfast), rain jacket, first-aid kit, water filter, headlamp backup, and any quick-access gloves or buff. This layer is what you dig into between camp meals.
Layer 5 — Lid / brain pocket: Permit in a ziplock, map, compass, sunscreen, lip balm, ID, phone, InReach, and your situational-awareness skills (bear spray is discouraged in California national parks).
Exterior: Trekking poles in side compression loops when not in use, two 1-liter water bottles in side mesh, ice axe if you're attempting an early-season Whitney, and tent stakes in the front mesh pouch. Never strap the canister to the outside; it'll knock against your kidneys and the lid can pop on a fall.
Bear canister orientation: vertical vs horizontal
There's a long-running debate on the JMT subreddit and High Sierra Topix: vertical or horizontal? Vertical wins in 90 percent of packs because it preserves the natural top-loading flow and centers weight on your spine. Horizontal works only if you have a sub-55L pack and need to wedge the canister low and across, but this pushes weight backward and forces you to lean forward all day. Test both at home with a loaded canister and a 30-pound dumbbell. You'll feel the difference immediately.
Balancing the load with trekking poles
A bear canister adds 8–14 pounds high in the pack, even when packed perfectly. That weight transfers to your knees on every descent—Glen Pass to Rae Lakes drops 1,500 feet in two miles, and Forester to Tyndall Creek loses 2,000. Trekking poles offload roughly 20–25 percent of the impact on knees and hips when descending, which compounds across a 7-day trip into the difference between fresh and shredded quads. They also help on the heavy-pack ascents above 11,000 feet where each step is harder thanks to thin air.
For Sierra trips with a bear canister you want poles that collapse short enough to strap on for hand-over-hand sections like the Whitney cables area, but extend long enough for tall hikers. The carbon-vs-aluminum debate matters less than the locking mechanism—flick-locks beat twist-locks at altitude every time.
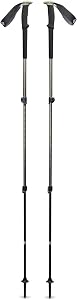
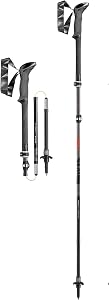
Nordic Lightweight 7075 Aluminum Trekking Poles
If you want a single pole pair that handles a fully loaded bear-canister carry without bending, the 7075 aluminum build on these poles is the right call. The 7075 alloy is stiffer and more crack-resistant than the 6061 aluminum used in budget poles, so the shaft won't flex when you weight it hard on a Forester switchback. They telescope down for pack-strapping and the flick-locks hold position even when caked in granite dust. Pair them with a 65L pack and a BV500 and you have a JMT-ready setup. View current price at Nordic Lightweight 7075 Aluminum Trekking Poles on Amazon.

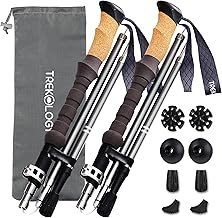
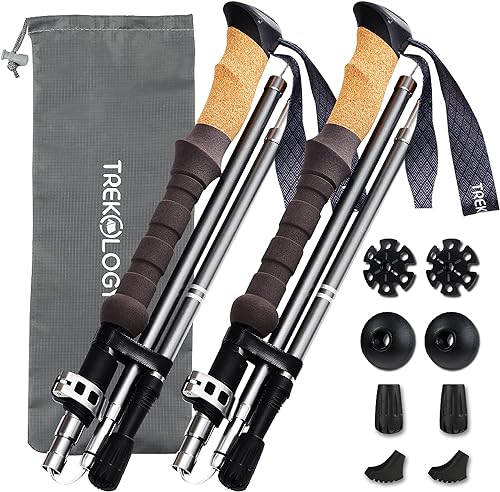
TREKOLOGY Trek-Z Cork Grip Folding Trekking Poles
For ultralight thru-hikers who already shaved every ounce off their canister kit, the Trek-Z folding poles collapse to about 15 inches—small enough to fit inside the canister-adjacent gear sleeve or strap flat against the lid. The cork grip wicks sweat better than foam on hot Whitney summit days, and the Z-fold design (rather than telescoping) means there's no twist-lock failure point. They're not as stiff as 7075 aluminum poles, so heavier hikers (200+ pounds with a loaded pack) should size up. Check the current listing at TREKOLOGY Trek-Z Cork Grip Folding Trekking Poles.
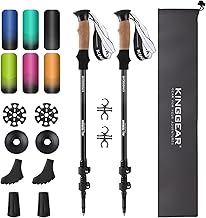
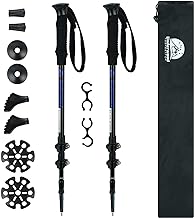
Collapsible Aluminum Trekking Poles, 2-Pack
If you're outfitting a group permit—say, a four-person Whitney trip where two members forgot to bring poles—the 2-pack collapsible aluminum option is the budget pick. They're not as light as carbon and not as stiff as 7075 aluminum, but they hold a heavy bear-canister pack just fine on standard JMT terrain. Useful as backup or loaner poles on group trips. Pricing and stock at Collapsible Aluminum Trekking Poles 2-Pack on Amazon.
Trekking pole comparison for bear-canister Sierra trips
| Pole | Material | Lock type | Best for | Pack-strap friendly? |
|---|---|---|---|---|
| Nordic Lightweight 7075 | 7075 aluminum | Flick-lock | Heavy bear-canister loads, JMT thru-hikes | Yes — telescopes |
| TREKOLOGY Trek-Z Cork | Aluminum, cork grip | Z-fold lever | Ultralight, short collapsed length | Yes — folds to ~15" |
| Collapsible 2-Pack | Aluminum | Twist-lock | Group trips, budget, loaners | Yes — telescopes |
A 7-day JMT load-out with a BearVault BV500
Here's how a 7-day southbound JMT segment from Tuolumne Meadows to Reds Meadow packs into a 65L Osprey Atmos AG. Total trail weight: 38 pounds at start, 26 at end. Bear canister: 11.5 pounds loaded, 1.5 pounds empty.
Inside the canister: 7 breakfasts (oatmeal + Starbucks Via), 7 dinners (Mountain House + olive oil pour), 21 snack bars, 6 tortillas + peanut butter, salami, hard cheese, electrolyte powder, instant coffee, dark chocolate. Food weight: 10 pounds. The BV500 holds 11.5 cups; this packs to about 95 percent full.
Vertical in the middle of the pack: Canister with sleeping pad curved against the back panel.
Bottom: 20°F down quilt in compression sack, Crocs.
Around canister: Two-person trekking tent (split between two hikers means just the fly and poles here), down jacket, rain shell stuffed at the side, base layer set.
Top: Day food bag with the day's snacks and lunch pulled at breakfast, water filter (Sawyer Squeeze), 0.5L dirty water bottle, sunscreen, first aid, repair kit.
Lid: Permit, Tom Harrison JMT maps, InReach Mini 2, phone, headlamp, sunglasses.
External: Trekking poles strapped to side compression at trailhead and on any cable sections, two Smartwater 1L bottles in side mesh, no canister-on-outside ever.
For more on building this kit, see our 2026 JMT gear list and the matching ultralight backpacking checklist.
Mistakes to avoid
The five most common errors when learning how to pack backpack with bear canister sierra style:
1. Strapping the canister to the outside. Looks fine in a Reddit photo, fails on Forester. The cylindrical weight swings, beats your kidneys, and the BV500 lid can torque open on a fall.
2. Loading the canister last. If you pack everything else first and try to wedge a full canister into the top, you'll never get it centered. Canister goes in first or second, before clothing.
3. Skipping the test pack at home. Load the canister with cans of soup to match your trip's food weight, strap it in, and walk the block. You'll find the imbalance before you find it at 11,000 feet.
4. Burying the day's food. Pull each day's snacks and lunch into a separate ziplock at breakfast and stow it at the top. Digging into the canister at 1 p.m. when you're cold and hungry is miserable.
5. Forgetting smelly non-food items. Toothpaste, sunscreen, lip balm, deodorant, and trash all go in the canister overnight. Rangers will cite you, and bears can smell unwrapped sunscreen from 100 yards.
For complementary advice on water carry and pole technique on these passes, see our breakdown of trekking poles for Sierra passes.
Frequently Asked Questions
Does the BearVault BV500 fit horizontally or vertically in a 65L pack?
Both, but vertical is recommended in any pack 60L or larger. The BV500 is 12.7 inches tall and 8.7 inches in diameter, which slides into a top-loader cleanly when oriented vertically. Horizontal works only when you have a shorter torso pack and need to wedge the canister low, but it pushes weight backward and is harder on your lower back over long miles.
What size backpack do I need for a 7-day Sierra trip with a bear canister?
A 60–75 liter pack with a 35–45 pound load rating. The BV500 plus food, 20°F bag, tent, and clothing for 7 days lands at about 38–42 pounds at trailhead. Packs under 55L force the canister to ride external, which is unsafe on exposed switchbacks. Packs over 80L tempt you to overpack and rarely improve carry comfort.
Can I attach my trekking poles to my pack while carrying a bear canister?
Yes. Most 65L packs have side compression loops or dedicated trekking pole keepers that don't interfere with a vertically loaded canister. Collapse the poles, slide them tip-up into the bottom loop, and secure the upper grip with the compression strap. The Trek-Z folding design is especially friendly because the collapsed length clears the lid pocket.
Do rangers actually inspect bear canister packing at Sierra trailheads in 2026?
Yes. Whitney Portal, Onion Valley, Tuolumne Meadows, and Sunrise Lakes trailheads all see ranger checks during peak season (June through September). They're not checking how you packed it inside the pack—they're checking that you have an IGBC-approved model, that it's accessible (not buried so deep you can't pull it for camp), and that all scented items are stowed at registration.
How do I balance a top-heavy bear canister load on steep descents?
Three techniques. First, cinch your hip belt tight and your load-lifter straps until the pack pulls forward off your shoulders. Second, plant trekking poles aggressively—shorten them by 5–10 cm on descents so they take more weight. Third, take shorter, faster steps rather than long strides; this keeps the canister-loaded pack from swinging and pulling you off-balance on switchback turns.
What goes in the bear canister besides food on a Sierra trip?
Everything with a smell: toothpaste, toothbrush, sunscreen, lip balm, deodorant, soap, hand sanitizer, trash and food wrappers, and anything you'd pack into a kitchen bag. Stove fuel canisters are debated—most rangers say no fuel inside the canister, but stored separately at camp. Always check the specific national park's regulations before your trip; Sequoia-Kings Canyon and Yosemite differ slightly on fuel rules.
Is it worth bringing two trekking poles or just one for a heavy bear-canister carry?
Two, always. A single pole helps on flat trail but leaves your other knee unsupported on long descents. With 35+ pounds in the pack, dual-pole technique distributes 20–25 percent of impact off your knees per step. The cost-to-weight ratio of a second pole is the best gear upgrade you can make for a Sierra permit trip.
Key Takeaways
- Choosing the right how to pack backpack with bear canister sierra means matching capacity and output ports to your actual devices
- Always check actual watt-hours (Wh), not just watts — runtime depends on Wh, not peak output
- Also covers: bear canister packing strategy sierra
- Also covers: BV500 packing in backpack
- Also covers: sierra nevada bear canister load
- Compare price-per-Wh across models to find the best value for your budget