Looking for the best daypack for photographers hiking with DSLR camera gear in 2026? You need a pack that protects expensive glass, distributes 15-25 pounds of camera weight comfortably across your hips, and gives quick side-access to your body without removing the pack. The top picks combine a padded camera insert (ICU), a 20-30L main compartment for layers and water, daisy-chain webbing for a tripod, and a built-in rain cover. Below we break down the must-have features, recommend complementary trekking poles to take pressure off knees under that load, and answer the common questions photographers ask before buying.
What makes a photography hiking daypack different
Top Picks


A regular daypack treats your gear as soft luggage. A photography-specific daypack treats it as fragile, expensive, and frequently-accessed cargo. The difference matters when you're four miles into a trail at dawn and a herd of elk crests the ridge. You don't have 90 seconds to swing the pack off, kneel, unzip the top, and dig past your puffy jacket. You need a side-access door that pivots the pack into your lap while one strap stays on your shoulder, exposing the camera body in under five seconds.

The second difference is internal structure. A photographer's pack uses padded dividers — often a removable Internal Camera Unit (ICU) — that suspend lenses and bodies in dedicated cubes so they don't slam into each other on a downhill scramble. Without that structure, a $2,000 lens becomes a $2,000 paperweight after one rolled ankle.

Features to demand in 2026
Side-access and clamshell entry
Look for a hip-side zip that opens to the main camera compartment without unloading the rest of the pack. F-Stop, Shimoda, Lowepro ProTactic, and Wandrd PRVKE all offer variations of this. Top-access alone is fine for B-roll on a flat boardwalk; never fine on a real trail with shifting wildlife.
Load-bearing hip belt
Anything over 12 pounds belongs on your hips, not your shoulders. A padded, contoured belt with stiffened lumbar support transfers 70-80% of pack weight to your skeletal frame. Cheap daypacks with strap-only belts will leave you with a knotted upper trapezius by mile six. For a deep dive on belt design and frame sheets, see our long-distance camera backpack guide.
Tripod and pole carry
Most photographers carry both a tripod (for landscapes at golden hour) and trekking poles (for descending with 18 pounds of glass). Look for stretch side-pockets paired with compression straps that can hold either, and ideally a dedicated front sleeve with a kick-stand pocket for the tripod feet so its weight rides centered.
Weather protection
An integrated rain cover stowed in a bottom zip-pocket beats a separately-purchased cover every time, because you'll actually deploy it. DWR-coated 420D nylon shells shed mist; only the rain cover handles a real downpour. Verify the cover extends over the hip belt — many don't, and a soaked belt against your shirt is miserable for the last three miles.
Hydration sleeve and bottle pockets
You'll burn 3,000+ calories on a moderate 10-mile day with a loaded pack. You need at least 2L hydration capacity, ideally with both a reservoir sleeve and dual stretch bottle pockets. The bottle pockets double as tripod sleeves when you're hydrating from the reservoir, so don't skimp on their depth.
Capacity: how many liters do you actually need?
For day hikes (sunrise to sunset) with one body, two lenses, layers, food, water, and a light tripod: 20-25 liters. For dawn-patrol shoots where you carry minimal extras: 16-18L is plenty and rides faster. For backcountry overnights with camera gear plus sleeping system: 35-45L — that's no longer a daypack and changes the conversation entirely.
Resist the urge to oversize. An empty 35L pack on a casual hike will sag, sway, and end up half-loaded with the wrong stuff. The best daypack for photographers hiking with DSLR kits is the smallest one that fits your shot list, not the largest one your wallet allows.
Why trekking poles belong in this conversation
Photographers carry weight asymmetrically. Even with a perfectly fitted pack, you're regularly stopping to crouch, kneel, brace against rocks, and stand up holding a 5-pound camera-and-lens combo at chest height. The compound effect on knees and lower back over a 12-mile day is significant — biomechanics studies of hikers under load consistently show trekking poles reduce knee compression force by 15-25% on descents.
For a photographer specifically, poles also serve as ad-hoc monopod stabilizers. Brace one pole against your sternum, rest the lens barrel on your hand at the top of the grip, and you've got a 1/30-second sharp shot in low light without unpacking a tripod. Three poles to consider for the 2026 season:
Comparison: trekking poles for photographers
| Pole | Material | Packed length | Weight (pair) | Grip | Best for |
|---|---|---|---|---|---|
| Nordic Lightweight 7075 Aluminum | 7075-T6 aluminum | ~25 in (telescoping) | ~17 oz | EVA foam | Daily trail use, snow baskets included |
| TREKOLOGY Trek-Z Cork Grip Folding | 7075 aluminum, Z-fold | ~15 in (folded) | ~17.6 oz | Natural cork | Travel — fits inside a 20L daypack |
| Collapsible Aluminum 2-Pack | Aluminum, telescoping | ~26 in (collapsed) | ~21 oz | Foam | Budget pick, share with a partner |
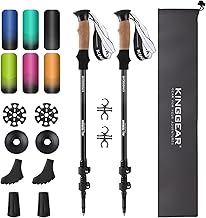
Nordic Lightweight 7075 Aluminum Trekking Poles
The 7075-T6 alloy is the same temper used in aircraft and mountain-bike frames — significantly stronger per ounce than the 6061 aluminum in budget poles. For a photographer leaning hard on a pole while bracing for a long-lens shot on a sloped ridge, that stiffness matters. The EVA foam grip extends down the upper shaft so you can choke up on traverses without re-adjusting length, and snow baskets are included for shoulder-season hikes when you need them. View on Amazon
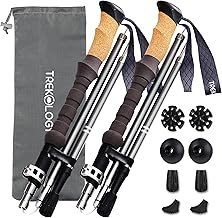
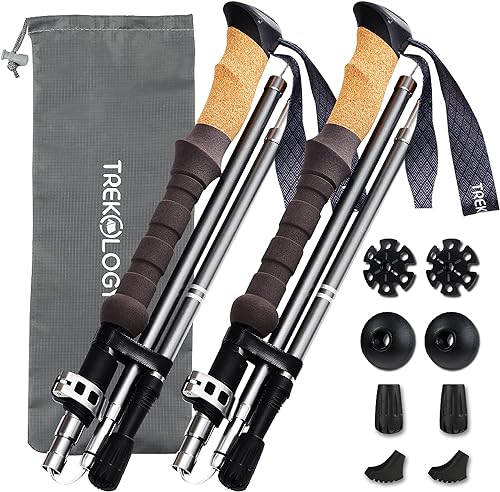
TREKOLOGY Trek-Z Cork Grip Folding Trekking Poles
The Z-fold design collapses to roughly 15 inches — short enough to disappear inside the main compartment of a 20L photography daypack, which means you can fly with them and stuff them in a carry-on. Natural cork grips wick sweat better than foam on hot summer climbs and won't get slippery the way EVA does. The flick-lock mechanism is fast enough to extend a pole one-handed while still holding your camera in the other — exactly the workflow you want when light is changing fast. View on Amazon
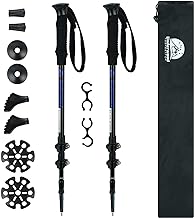
Collapsible Aluminum Trekking Poles, 2-Pack
Two full pairs in one box at a budget price — pair one for you, one for a hiking partner or photo assistant. Standard telescoping aluminum construction with flick-locks and foam grips. They're not as light or as compact as the Trek-Z but they're plenty stiff for a photographer's bracing-and-stabilizing use case, and a sensible entry point before committing to carbon fiber. View on Amazon
Setting up the pack on the trail
The biggest performance gain comes from how you load the pack, not which pack you bought. Heaviest item (usually the camera body with telephoto mounted) sits as close to your spine as possible and centered between your shoulder blades. Lighter items (extra lens, snacks, rain shell) fill the outside. A 70-200mm f/2.8 wedged out near the back panel of the pack will throw your center of gravity by 4-6 inches and exhaust you twice as fast.
Set the hip belt first — tight, centered over the iliac crest. Then the load-lifter straps at the top of the shoulder harness pulled to a 30-45° angle. Then the shoulder straps, snug but not weight-bearing. Then the sternum strap. Skipping the hip-first sequence is the most common error and the one that ruins backs over a season.
For tips on loading specific kit combinations, see our multi-day camera packing guide and the heavy-load trekking pole rundown.
The bottom line
The best daypack for photographers hiking with DSLR gear in 2026 is the smallest pack that fits your kit, opens from the side, transfers weight to your hips, and lets you lash a tripod and a pair of poles to the outside. Pair it with a folding cork-grip trekking pole that disappears into the main compartment when you don't need it, and you've got a hiking-photo system that'll carry you through a full season of trails without wrecking your knees or your gear.
Frequently Asked Questions
What size daypack is best for hiking with DSLR camera gear?
20-25 liters covers a full-day shoot with one body, two lenses, layers, 2L water, snacks, and a light tripod. Drop to 16-18L if you're going minimalist or doing a sunrise dash and home by 9am. Above 30L you're into overnight territory and the pack will be too tall to wear comfortably with a camera strapped to your chest.
Is a camera-specific backpack better than using a regular hiking pack with a camera insert?
For occasional hikes, an off-the-shelf insert (Tenba BYOB, F-Stop ICU) dropped into any hiking daypack works fine and saves money. For frequent or serious hiking with DSLR gear, a purpose-built pack wins on side-access speed, hip-belt load transfer, and weatherproofing. Test both — most photographers eventually migrate to purpose-built once they've done a few full-day hikes.
Can you put a DSLR with a long telephoto lens in a hiking daypack?
Yes, with caveats. A 100-400mm or 70-200mm f/2.8 fits in a 25L+ photography pack if stored mounted to the body. Use the longest-dimension cube and orient the lens vertically so it spans the depth of the pack, not the height. Avoid jamming a 600mm prime into a daypack — that lens belongs in a dedicated long-lens case with its own shoulder harness.
Do I need trekking poles if I'm carrying camera gear?
For day hikes under 5 miles with under 15 pounds total, optional. For anything longer or heavier, strongly recommended — a 15-25% reduction in knee compression force on descents is significant when you're doing this every weekend. Photographers also benefit from the in-a-pinch monopod use case for low-light handheld shots.
How do I protect my camera from rain on a hike?
Layer the defenses. First: a weather-sealed camera body and lens (most enthusiast and pro DSLRs are). Second: a DWR-coated pack shell. Third: the integrated rain cover deployed at the first hint of weather, not when it's already pouring. Fourth: a microfiber towel and a roll-top dry bag inside the main compartment as a fail-safe for the electronics-heavy items.
What's the difference between a sling, a holster, and a daypack for photographers?
A sling carries one body and one lens — quick access, terrible load distribution beyond 8 pounds. A holster is even smaller, basically a chest-worn pouch for one camera and a snack. A daypack is the only format that comfortably carries the full hike kit (camera, water, food, layers, first aid, navigation, tripod) for a full day on the trail. Use the sling for urban photo walks, the daypack for hiking.
How heavy is too heavy for a hiking camera backpack?
The traditional rule is 20% of your body weight for an all-day hike. For a 170-pound photographer, that's 34 pounds maxed-out — and you won't enjoy a 12-mile day at that ceiling. Aim for 25-28 pounds loaded if you're doing serious mileage. If your camera kit alone is pushing 20 pounds, audit which lenses you actually use on the trail and leave the heavy specialty glass at home.
Key Takeaways
- Choosing the right best daypack for photographers hiking with DSLR means matching capacity and output ports to your actual devices
- Always check actual watt-hours (Wh), not just watts — runtime depends on Wh, not peak output
- Also covers: hiking camera backpack mirrorless lens
- Also covers: photographer day hike pack tripod loop
- Also covers: Peak Design vs Shimoda hiking camera bag
- Compare price-per-Wh across models to find the best value for your budget