Learning how to fit hiking backpack with scoliosis means adapting the standard fit rules to your specific spinal curve. The core technique: measure your torso while seated (not standing), set the hip belt level on the bony tops of your iliac crests rather than at a fixed waist height, then adjust each shoulder strap independently so the pack rides centered over your hips rather than parallel to your uneven shoulders. Add load lifters pulled snug, a sternum strap set diagonally to favor your high shoulder, and a pair of trekking poles to offload 20-25% of weight from the spine itself.
Why Standard Backpack Fit Advice Fails Scoliosis Hikers
Top Picks


Most fit guides assume a symmetric torso, level shoulders, and a roughly straight spine from C7 (the bony bump at the base of your neck) down to the iliac crests. With scoliosis - whether mild (10-20° Cobb angle), moderate (20-40°), or severe (40°+) - at least three things break that assumption:
- Your effective torso length differs left versus right by 1-4 cm
- One shoulder sits higher than the other, usually opposite the rib hump
- Your iliac crests may be uneven by up to half an inch
Loading a stock backpack onto that asymmetric frame pulls the heavy side of the pack into your spine's existing curve, accelerating fatigue, irritating the lumbar musculature, and - over multi-day trips - sometimes triggering radiating numbness down one arm or leg. Fixing fit is not cosmetic. It is the difference between hiking pain-free and being benched for a week.
Step 1: Measure Your Torso the Scoliosis Way
Standard torso measurement runs a flexible tape from C7 to the imaginary horizontal line between your iliac crests. With a curved spine, you cannot run the tape along your spine - it will under-measure by 1-3 cm because it tracks the curve rather than the vertical distance the pack actually spans.
Instead, sit upright on a hard chair with feet flat. Have a friend hold a yardstick vertically against the back of your skull, hanging straight down. Mark C7 on the yardstick, then mark the higher of your two iliac crests. Read the vertical distance. That is your effective torso length for fit purposes.
Most scoliosis hikers find they need a pack one size shorter than the standard chart suggests, because the curved spine "eats" some of the chart's nominal length. If you are between sizes, size down - a too-long pack rotates the hip belt forward and dumps weight onto your shoulders, the exact opposite of what your asymmetric shoulders can tolerate.
Step 2: Anchor the Hip Belt on the High Side First
The hip belt carries 70-80% of pack weight when set correctly. With uneven hips you have a choice: align the belt parallel to the floor, or align it to your iliac crests (which are not parallel). Align to the crests.
The hip belt grips the bony tops of the iliac crests like a shelf. If you force it level with the ground, on a tilted pelvis the low side slides off the crest and the load transfers back up to your shoulders. Tilt the belt to follow your hips, and the pack rides where it is supposed to.
Tighten the high-side strap first by 60-70% of target tension. Then tighten the low-side strap until the belt is snug but not pinching. Finally, top up the high side. This sequence pulls the pack body toward the high hip, counteracting the natural drift toward your low shoulder.
Step 3: Independent Shoulder Strap Adjustment
Almost every hiking pack on the market uses one ladder-lock buckle per shoulder strap. Use them independently - do not try to keep both straps at matching lengths.
- The strap on your high shoulder should be longer (looser) by 2-4 cm
- The strap on your low shoulder should be shorter (snugger)
The instinct is to do the opposite - tighten the high side to "pull the pack up to match" - but that drives the load further into your already-elevated trapezius and triggers the trigger-point pain most scoliosis hikers know well. Looser on the high side, tighter on the low side, with the load lifters doing the work of holding the top of the pack against your back.
Load lifters should sit at roughly 45° from the top of the shoulder strap up to the pack frame. Pulled too tight, they yank the pack forward and increase low-back load. Too loose, the pack sags backward and pulls on your high shoulder.
Step 4: Offset the Sternum Strap Diagonally
The sternum strap on a symmetric body sits horizontally across the sternum at about nipple-line height. Part of how to fit hiking backpack with scoliosis correctly is sliding the sternum strap up on the high side and down on the low side, so the strap runs diagonally rather than horizontally. Most modern packs let you adjust each end independently along the rail.
This diagonal positioning does two things: it stops the high-side shoulder strap from sliding off the shoulder (a constant scoliosis annoyance), and it pulls the pack body inward toward your spine's center of mass rather than letting it twist around your torso over hours of hiking.
Step 5: Use Trekking Poles to Offload the Spine
Trekking poles are not optional for scoliosis hikers carrying anything over 15 lbs. Properly used poles offload 20-25% of body-plus-pack weight from the lower spine and hips per step, and they correct the asymmetric gait that uneven hips create. They also let you push with both arms, which counter-balances the rotational pull a one-sided pack creates over a long day.
Set both poles to the same length: measured from grip-top to tip, your elbow should sit at exactly 90° when the pole tip is on flat ground next to your foot. On descents, lengthen by 5 cm. On climbs, shorten by 5 cm. Never hike with a single pole - asymmetric pole use compounds your existing asymmetry.
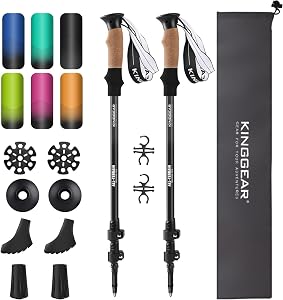
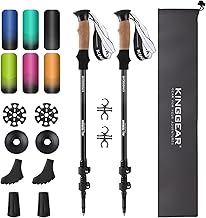
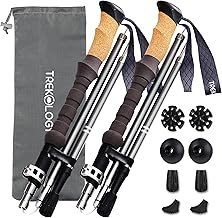
Nordic Lightweight 7075 Aluminum Trekking Poles
For scoliosis hikers, the Nordic Lightweight 7075 Aluminum Trekking Poles are the closest thing to a default recommendation in 2026. The 7075-grade aluminum shaft is roughly 30% stiffer than the 6061 alloy in most budget poles, which matters when you are actively pushing down through the poles to take weight off your lumbar spine - flex in the shaft means lost energy and continued spinal load. The flick-lock adjustment is fast enough to retune mid-hike when terrain changes, which scoliosis hikers do more often than most because asymmetric fatigue compounds with poor pole length. Shock absorption helps reduce the jarring force that travels up through the wrists into the shoulder girdle, where it can re-aggravate the high-shoulder side. View the Nordic 7075 poles on Amazon.
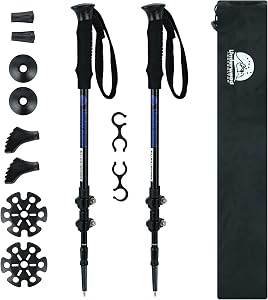
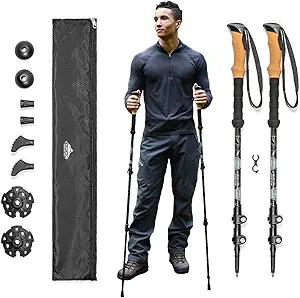
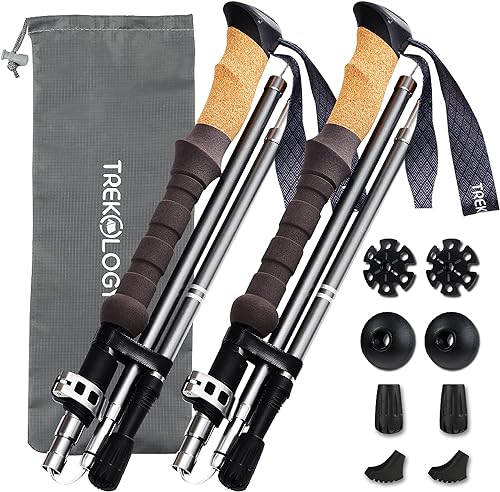
TREKOLOGY Trek-Z Cork Grip Folding Trekking Poles
The TREKOLOGY Trek-Z Folding Trekking Poles solve a problem specific to scoliosis hikers who travel by plane: they collapse short enough (around 15 inches) to fit inside a checked carry-on, so you can fly to a trailhead and still arrive with the poles that match your hip alignment. The cork grip is the killer feature here - cork molds to your hand over time and absorbs sweat, reducing the grip-tension creep that scoliosis hikers feel in their forearms after hours of holding poles tighter on one side. The Z-fold construction is slightly less stiff than telescoping poles, so prioritize these for day hikes and weekend trips rather than week-long expeditions with a 35-lb pack. View the TREKOLOGY Trek-Z on Amazon.
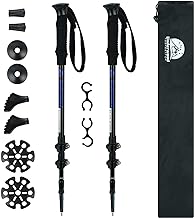
Collapsible Aluminum Trekking Poles, 2-Pack
The Collapsible Aluminum Trekking Poles 2-Pack is the budget option for hikers who want to try pole-assisted hiking before committing to a higher-end set. For scoliosis hikers specifically, the two-pack pricing matters because you need both poles - single-pole hiking actually worsens asymmetric load by adding a third asymmetric support to your already asymmetric body. Use both, set them to the same length, and let them do the symmetry-correction work. Adjustment range is wide enough to fit hikers from 5'0" to 6'4", and at this price you can keep a spare in the car for impromptu trail days. View the 2-pack on Amazon.
Trekking Pole Comparison for Scoliosis Hikers
| Feature | Nordic 7075 | TREKOLOGY Trek-Z | Collapsible 2-Pack |
|---|---|---|---|
| Shaft material | 7075 aluminum | Aircraft aluminum | Standard aluminum |
| Grip | EVA foam | Natural cork | Foam |
| Adjustment | Flick-lock telescoping | Z-fold + flick-lock | Twist-lock telescoping |
| Packed length | ~24 in | ~15 in (carry-on safe) | ~26 in |
| Shaft stiffness | Highest | Medium | Standard |
| Best for scoliosis use | Heavy multi-day loads | Travel / fly-in trips | First-time pole users |
Pack Volume and Weight Limits With a Curved Spine
Asymmetric spines tolerate less weight than symmetric spines, full stop. Rough guidelines for 2026:
- Mild scoliosis (10-20°): Max pack weight 20% of body weight
- Moderate scoliosis (20-40°): Max pack weight 15% of body weight
- Severe or post-fusion: Max pack weight 12% of body weight, and consider a base-camp style trip where you carry only a daypack
A 160-lb hiker with moderate scoliosis should cap at 24 lbs total pack weight including water. This rules out most internal-frame backpacking packs over 50L for week-long trips - you either shorten the trip, share weight with a partner, or accept that the pack will be partially empty.
For trip planning, see our lightweight day pack fit guide for sub-30L daypacks, and our best hiking backpacks for bad back roundup for spine-friendly internal-frame options.
Pack Features That Help Scoliosis Hikers
When shopping, prioritize these features in order:
- Adjustable torso length via a slider on the shoulder yoke - lets you fine-tune for your vertical (not curve-following) torso
- Dual-density hip belt - softer foam against the body, firmer foam in the load-bearing layer
- Wide, low-profile sternum strap rail - for diagonal positioning
- Load lifters mounted at the frame top, not the collar - for proper 45° angle
- Removable hip belt - lets you swap in a custom-cut belt if your iliac asymmetry is severe
- Internal frame with two flexible stays that can be bent - most scoliosis hikers bend the stays to match their thoracic curve, dramatically improving comfort
Avoid rigid plastic frame sheets without stays, fixed-length shoulder yokes, hydration sleeves that force the pack body away from your spine, and any pack labeled "unisex" without size variants - those are typically cut for a 5'10" symmetric male torso.
Weight Distribution Inside the Pack
For symmetric hikers, the rule is "heavy stuff close to your back, between your shoulder blades." For scoliosis hikers, modify slightly: heavy items still go close to your back, but position them slightly toward your low shoulder side, so the load's center of mass sits roughly over the midline of your hips rather than the midline of your shoulders. Lighter, bulky gear (sleeping bag, puffy jacket) goes at the bottom and on the high shoulder side to counterbalance.
You can test the result by standing in front of a mirror with the loaded pack on. The pack body should appear vertical relative to the floor, not tilted to match your shoulders. If you can see it leaning toward the low shoulder, redistribute weight toward the high side.
For descent-specific pole technique that also protects the spine, see our companion guide on trekking poles for knee pain - many of the same plant-and-push patterns reduce vertebral compression on switchbacks.
Frequently Asked Questions
Can I hike with a backpack if I had spinal fusion surgery?
Yes, most post-fusion patients can hike with a backpack after the standard 12-month healing window, with surgeon clearance. Keep pack weight under 12% of body weight, use trekking poles always, and choose a pack with bendable internal stays that you can shape to match your fused curve. Avoid pivoting twists when removing the pack - set it down with both hands, squatting straight down rather than rotating one shoulder out of the strap.
What is the best hiking backpack for scoliosis women?
The Osprey Aura AG series remains the most consistently recommended pack for scoliosis women in 2026, primarily because its tensioned mesh suspension flexes independently across the back panel and accommodates asymmetric torsos better than rigid frame sheets. Pair it with a smaller volume (50L max for moderate scoliosis) and use the adjustable torso slider to dial in fit on the longer of your two sides.
How tight should the hip belt be with scoliosis?
Snug enough that you can slip two fingers between the belt and your hip, but not three. With scoliosis, prioritize symmetric contact pressure left-to-right over absolute tightness - if one side is biting and the other has a gap, loosen the bitten side rather than tightening the gap side. A correctly fit belt feels like it is hugging your iliac crests rather than squeezing your waist.
Will trekking poles actually help my scoliosis pain on hikes?
Yes, in two ways: poles offload 20-25% of vertical load from the spine per step, reducing compressive force on the discs adjacent to your curve, and they regulate gait symmetry, preventing the asymmetric stride that uneven hips naturally create. Most scoliosis hikers who add poles report 40-60% reduction in post-hike spinal soreness within their first three trips.
Should I get a custom-fit backpack for scoliosis?
Custom packs from Seek Outside, Kifaru, and a handful of cottage builders run $400-700 and add 6-10 weeks of lead time, but they let you specify shoulder strap lengths independently and order an asymmetric hip belt. For moderate-to-severe scoliosis with regular multi-day trips, the math works out within 18 months versus replacing off-the-shelf packs that wear unevenly. For occasional weekend hikers, stick to off-the-shelf with the fit techniques above.
How do I measure my torso for a backpack if I have scoliosis?
Sit upright, have someone hold a yardstick vertical (not along your spine), and measure the vertical distance from C7 at the base of your neck to the higher iliac crest. This vertical measurement - not the curved-along-spine measurement - is what your pack actually has to span. Most scoliosis hikers measure 1-3 cm shorter this way than they would using a flexible tape along the spine, and should size their pack accordingly. See our how to measure torso length guide for visual diagrams.
What pack weight is safe for moderate scoliosis on a multi-day hike?
For a 25-40° Cobb angle, cap total pack weight at 15% of body weight. A 150-lb hiker should not exceed 22 lbs including water and consumables. To make a 3-day trip work at that weight in 2026, you need ultralight gear: a pack under 2 lbs, a quilt instead of a sleeping bag, a single-wall shelter, and a meal plan that averages 1.0 lb of food per person per day.
Do I need a women's pack if I'm a man with narrow shoulders and scoliosis?
Possibly. Women's packs are cut for shorter torsos and narrower shoulder yokes, both of which often help men with scoliosis whose effective torso measures shorter than their height suggests. Try a women's S/M alongside a men's S - the better-fitting one is the right answer, regardless of the label. The full method for how to fit hiking backpack with scoliosis is to ignore the gender label and trust the measurement.
Key Takeaways
- Choosing the right how to fit hiking backpack with scoliosis means matching capacity and output ports to your actual devices
- Always check actual watt-hours (Wh), not just watts — runtime depends on Wh, not peak output
- Also covers: backpack fitting uneven shoulders
- Also covers: scoliosis hiking pack adjustment
- Also covers: load lifter tuning for scoliosis
- Compare price-per-Wh across models to find the best value for your budget