Fitting trail running shoes when you have bunions and hammertoes comes down to four things: a genuinely wide toe box (not just a "wide" size code), a soft and seamless upper that does not press on the medial bump, smart lacing that locks your midfoot without crushing your forefoot, and a half-size of growing room in the toe length so descents do not jam your toes into the front. The short answer to how to fit trail running shoes for bunions is: measure your foot at the end of the day, fit to the widest point first, and only then check length.
This 2026 guide walks through the exact fitting steps and adds a downhill-impact mitigation strategy that most "best shoes for bunions" lists never mention — trekking poles — because no shoe alone can save a bunion from a five-hour rocky descent.
Why standard shoe fitting fails feet with bunions and hammertoes
Top Picks

A bunion (hallux valgus) pushes the first metatarsal head outward and angles the big toe inward. A hammertoe bends the middle joint of a lesser toe upward. Both deformities change three measurements your shoe needs to accommodate: forefoot width, forefoot volume (vertical clearance above the toes), and the angle of pressure across the front of the foot. A traditional running last is built for a roughly triangular foot that tapers from heel to toes. Bunion-and-hammertoe feet are closer to square or even reverse-tapered, so a shoe that fits the heel correctly often pinches the forefoot, and a shoe that fits the forefoot is sloppy at the heel.
The fix is not to simply size up. Sizing up gives you more length without solving width or volume, and a longer shoe slides forward on descents, slamming your already-irritated toes into the front bumper.

Step-by-step: how to fit trail running shoes for bunions and hammertoes
1. Measure both feet at the end of the day
Feet swell up to a half size after a full day of activity. Use a Brannock device or trace each foot on paper while standing, then measure length (heel to longest toe) and width (across the widest point of the forefoot, which on a bunion foot is across the first metatarsal bump). Always fit to the larger foot.
2. Prioritize last shape over brand reputation
Brands that consistently make a true anatomical toe box: Altra (zero-drop, foot-shaped last across all models), Topo Athletic (anatomical toe box with a 3-5mm drop if you don't want zero-drop), Lems (extremely wide but minimalist), and the wide-fit variants from Hoka (Speedgoat Wide, Challenger Wide) and Brooks (Cascadia in 2E or 4E). Avoid anything labeled "performance" or "racing" from European brands — those lasts are almost always narrow.
3. Check the toe box ceiling, not just the width
Hammertoes need vertical clearance. Press down on the upper above your toes while standing — if you feel any contact, the shoe will rub a raw spot within five miles. Soft mesh uppers with no overlays in the toe area are essential. Avoid welded TPU caps directly over the toe knuckles.
4. Look for a seamless or stretch medial panel
The bunion bump itself needs a soft landing zone. Some manufacturers (Altra, Topo) build with no overlay seams across the forefoot. Others (Hoka, Saucony) use stretch knit panels over the bunion area. Run your finger inside the shoe along the medial forefoot — any plastic ridge or stitched seam will become a hot spot.
5. Lace to lock the midfoot, not the forefoot
Use a "window" lacing technique: skip the eyelets directly above your bunion bump, then resume normal lacing toward the ankle. This holds your heel in place without compressing the bunion. The "runner's loop" (heel-lock) at the top eyelets prevents forward sliding on descents.
6. Test with the socks and insoles you will actually wear
Bring your trail socks (typically a wool blend with reinforced toes) and any custom orthotic. The shoe must accommodate the total volume. If you use a metatarsal pad or toe spacer for the bunion, fit with those installed.
7. The 1.5cm rule, not the thumb-width rule
Standing, you want about 1.5cm (a thumbnail's width plus a touch more) between your longest toe and the front of the shoe. Trail descents pitch your foot forward; without that buffer, you will lose toenails. But do not go beyond 1.5cm, or the shoe will slide.
8. Walk a ramp before you commit
Most specialty shops have an incline board. Walk down it. If your toes touch the front, the shoe is too small or the laces are too loose. If your heel lifts, the heel is too wide or you need a lace lock. Either way, do not buy it.
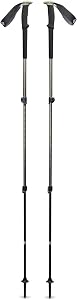
The hidden gear that protects bunion feet on descents: trekking poles
Here is the part most shoe-fit guides miss. Even a perfectly fit shoe transfers roughly 7-9 times bodyweight through the forefoot on a steep, technical descent. For a 70kg hiker, that is nearly 600kg of force pulsing through the exact spot a bunion is most sensitive. Trekking poles transfer roughly 25-30% of that load to your upper body, dramatically reducing forefoot strike force.
If you have bunions or hammertoes and you are heading onto trails longer than five miles, or with any meaningful descent, poles are not optional gear — they are foot-protection gear. Below are three options across price points that work well for forefoot-sensitive hikers.
| Pole | Material | Grip | Pack style | Best for bunion/hammertoe hikers |
|---|---|---|---|---|
| Nordic Lightweight 7075 Aluminum | 7075 aluminum | EVA foam | Telescoping | Long descents where load-shedding matters most |
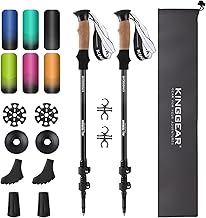
| TREKOLOGY Trek-Z Cork Grip | Aluminum | Natural cork | Z-fold | Multi-hour trips where sweat-resistant grip is critical |
| Collapsible Aluminum 2-Pack | Aluminum | Foam | Telescoping | Budget-conscious hikers testing poles for the first time |
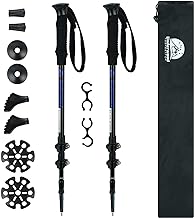
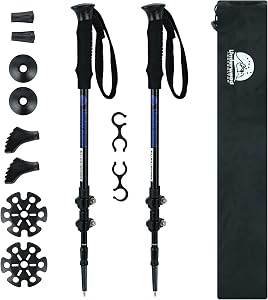
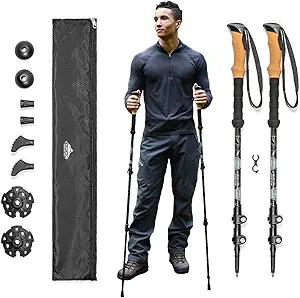
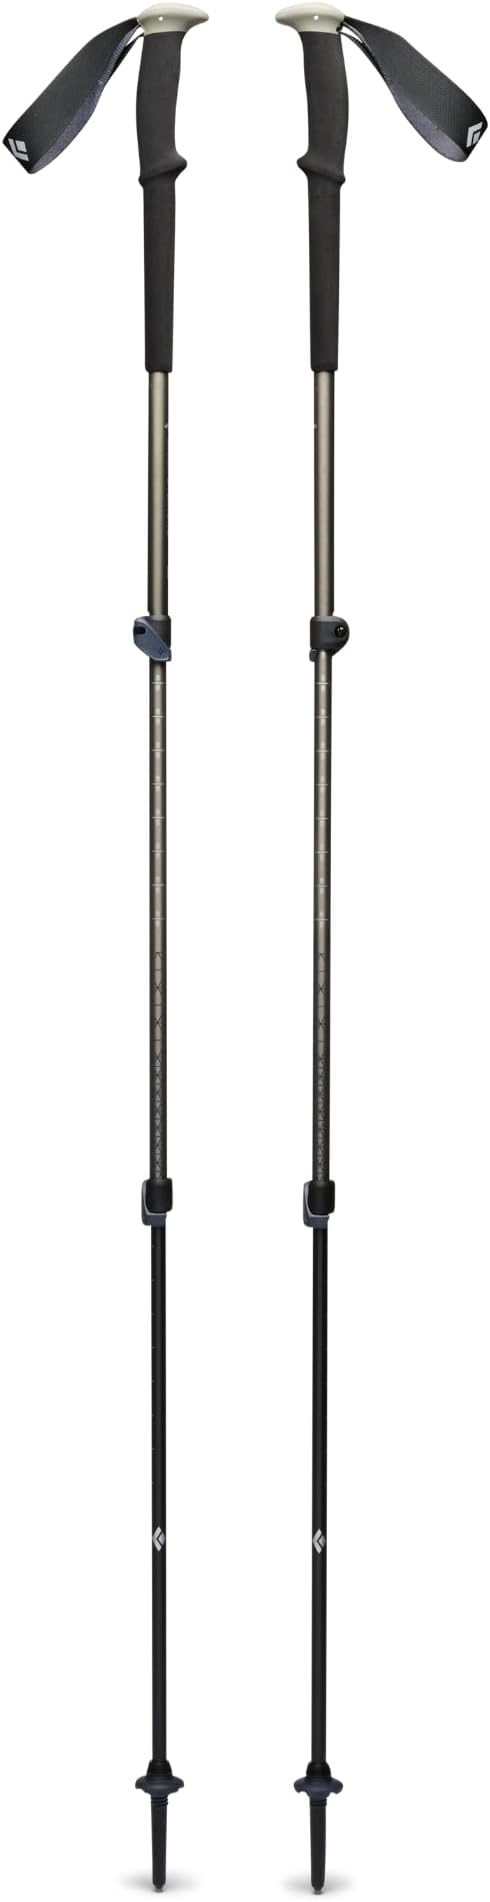
Nordic Lightweight 7075 Aluminum Trekking Poles
The 7075-grade aluminum used here is the same alloy aerospace manufacturers use for high-stress airframe components — it has roughly twice the yield strength of standard 6061 aluminum at nearly the same weight. For bunion and hammertoe hikers, the practical benefit is confidence: you can lean hard into the poles on a steep descent without worrying about flex or buckling, which lets you genuinely transfer weight off the forefoot. Telescoping adjustability also matters because the correct pole length for downhill (longer) is different from uphill (shorter), and aggressive descents are exactly when you need the extra length to keep your shoulders upright and your weight back off your toes. Check current price on Amazon.
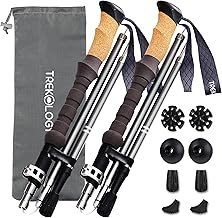
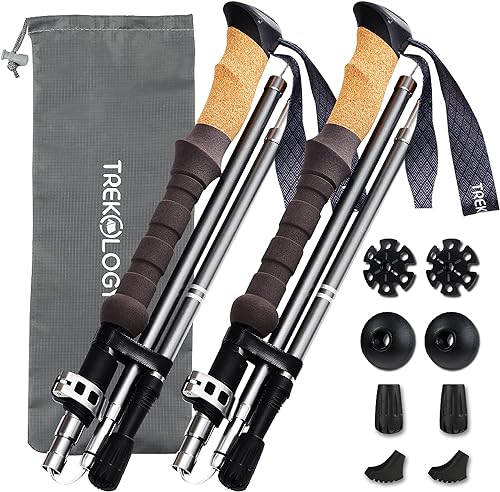
TREKOLOGY Trek-Z Cork Grip Folding Trekking Poles
Cork grips are the best choice if your hands sweat heavily or you are out for multiple hours. Cork wicks moisture, conforms to your hand shape over a few uses, and stays cooler than foam on hot days. The Z-fold design collapses to under 16 inches, fitting inside or strapped flat across most trail running packs without snagging branches. For someone managing forefoot pain, that means you can stash the poles on a flat section and redeploy them at the next descent without unstrapping anything bulky — which encourages you to actually use them when they matter. See it on Amazon.
Collapsible Aluminum Trekking Poles, 2-Pack
If you want to test whether poles meaningfully reduce your bunion pain before investing in premium models, this 2-pack is the lowest-risk entry point. The build is honest aluminum with foam grips — no carbon fiber claims, no shock-absorbing tricks that often fail on real trails. They telescope to fit most heights and pack down small enough for a daypack. Two poles in one purchase also lets you outfit a hiking partner so you both descend with full load support. View on Amazon.
Insoles, toe spacers, and other in-shoe modifications
Once the shoe fits, fine-tune with inserts. A metatarsal pad placed just behind the ball of the foot (not directly under it) helps splay the metatarsal heads slightly and offloads the bunion. Silicone toe spacers worn during recovery (not necessarily while hiking) help maintain big-toe alignment. If you use a custom orthotic, choose a shoe with a removable factory insole so the orthotic sits flat instead of stacked.
Avoid bunion sleeves and toe socks inside the shoe — they add bulk in exactly the wrong place and almost always create a new pressure point. Treat the in-shoe environment as a minimalist one.
Break-in protocol for trail shoes with foot deformities
Even a perfectly fit shoe needs progressive break-in if your feet have bunions or hammertoes. Wear them around the house for 30-60 minutes on day one. Walk a flat mile on day two. Add gentle terrain on day three. Do not go straight to a long descent. Any hot spot that develops in the first five miles is telling you the shoe will fail at mile ten — exchange it now, not after blisters form.
Related reading: our 2026 round-up of wide toe box trail runners, how trekking poles reduce foot and knee load on descents, and six lacing techniques for bunion relief.
Frequently Asked Questions
Should I size up trail running shoes if I have bunions?
Not for width — sizing up only adds length. Instead, choose a brand with a genuinely wide last (Altra, Topo, Lems) or order a wide-width variant (2E for men, D for women). Size up only if your toes touch the front when laced and standing, and even then by no more than a half size.
Are zero-drop shoes better for bunions and hammertoes?
Zero-drop shoes (Altra) let the foot splay naturally and reduce forefoot loading from heel elevation, which many bunion sufferers find more comfortable. However, the transition takes 6-12 weeks if you have been wearing traditional heeled shoes — going zero-drop overnight can cause Achilles and calf strain. Topo Athletic offers a useful middle ground with a 3-5mm drop and a wide toe box.
What is the best lacing technique for bunions?
The "window lacing" method: lace normally up to the eyelet pair below the bunion, then run the laces straight up to the next pair (skipping the crossover above the bunion), then resume crossover lacing. This eliminates pressure directly over the bony bump. Combine with a heel-lock loop at the top eyelet to prevent forward sliding on descents.
Can I run trails with hammertoes without losing toenails?
Yes, but you need three things: a tall enough toe box that the upper does not rub the bent joint, sufficient length so your toes do not jam the front on descents, and lacing that locks your midfoot. Trim toenails straight across and short before any long trail outing. Many hammertoe sufferers also benefit from gel toe caps on the affected toes during long descents.
Do trekking poles really help with forefoot pain from bunions?
Yes, measurably. Studies on pole-assisted hiking show 20-30% reduction in lower-extremity loading, with the largest reductions occurring during descents — exactly when bunion pressure peaks. For hikers with forefoot pain, poles are arguably more impactful than any single shoe upgrade.
How long should trail running shoes last with regular hiking?
300-500 miles is the typical lifespan, but bunion and hammertoe sufferers should replace earlier — around 300-350 miles. Once the midsole compresses, the shoe loses its forefoot cushioning and the bunion takes more direct impact. Track miles in a notebook or app; do not rely on visual wear of the outsole alone.
Should I see a podiatrist before buying trail shoes for bunions?
If your bunions are progressing (visibly worsening year over year), if you have pain at rest, or if you have already failed multiple well-fitted shoes, yes. A podiatrist can prescribe custom orthotics, suggest specific stretch protocols, and rule out arthritis. For mild-to-moderate bunions without rest pain, a quality fit plus the techniques above are usually enough.
Key Takeaways
- Choosing the right how to fit trail running shoes for bunions means matching capacity and output ports to your actual devices
- Always check actual watt-hours (Wh), not just watts — runtime depends on Wh, not peak output
- Also covers: wide toe box trail shoes bunion relief
- Also covers: hammertoe friendly trail running shoes
- Also covers: trail shoes for foot deformities
- Compare price-per-Wh across models to find the best value for your budget