Using trekking poles for glacier travel crevasse self-arrest is a niche but valuable skill that supplements—never replaces—a proper ice axe. On low-angle glaciers, well-chosen poles improve balance over snow bridges, probe for hidden crevasses, distribute weight on suspect crust, and give you a fraction of a second of deceleration if you punch through. In 2026, more weekend mountaineers are tackling moderate glacier terrain on routes like Mount Baker's Easton Glacier or the Vignemale, and the right pole setup can be the difference between a controlled slip and a full-body slide.
The honest truth: poles are not ice axes
Top Picks
Before we go any further: trekking poles cannot perform a true self-arrest the way a mountaineering ice axe can. The pick of an ice axe is designed to bite into firm snow or ice, anchor your body, and stop a slide on a steep slope. Trekking pole tips are not. They are carbide spikes intended to grip dirt and snow under body-weight loading, not to dig in and hold a falling 180-pound climber. On any glacier route involving steep slopes, exposed seracs, or substantial crevasse danger, you carry a real ice axe—period.
What poles do well is everything before the fall: probing the surface, balancing on snow bridges, catching small slips on flat terrain, and slowing a partial post-hole into a hidden slot long enough for your rope team to react. That is the realistic role of trekking poles for glacier travel crevasse self-arrest in 2026, and it is genuinely useful.

When poles make sense on a glacier
Poles shine on the approach and on low-angle glacier terrain (under roughly 25 degrees) where the consequence of a slip is a slide-to-stop, not a slide-into-the-void. Think Cascade volcano approaches, summer glacier crossings on European hut tours, and ski-mountaineering skin tracks. They also dominate during the long, painful descent back down moraine and lateral talus, where your knees will thank you.
On steeper sections, on rope teams traversing crevassed terrain, or anywhere a fall could become uncontrolled, you stow one or both poles and switch to the ice axe. Many guides recommend a one-pole-one-axe configuration once the angle picks up.

Quick checks for "is this pole terrain?"
- Slope angle under 25–30 degrees
- Run-out is flat snow, not a bergschrund or cliff
- Snow surface is consolidated or only lightly crusted
- You are roped up appropriately for the crevasse hazard
- You can deploy your ice axe in under 30 seconds if conditions change
What to look for in a glacier-capable trekking pole
Not every cheap pole survives glacier use. Cold makes plastic flick-locks brittle, ice loads bend thin aluminum, and slush eats lock mechanisms. Prioritize these features:
- 7075-series aluminum shafts. Stronger than 6061 and far more forgiving than carbon, which can shatter catastrophically under lateral load on ice.
- External flick-lock or Z-lock mechanisms. Twist locks freeze and slip when wet.
- Large-diameter snow baskets (90mm+). Standard trekking baskets sink uselessly into glacier snow.
- Cork or EVA grips with extended foam below the grip. Cork insulates from cold metal; the extended foam lets you choke down on side-hilling traverses without re-adjusting length.
- Adjustable length (110–135 cm range). You will shorten for uphill, lengthen for descent, and constantly tweak across cambered slopes.
- Wrist straps you can release fast. If you punch through, a strap that won't release can wrench your shoulder.
Comparison: three budget-friendly poles for glacier approach use
| Pole | Shaft | Lock type | Pack length | Best for |
|---|---|---|---|---|
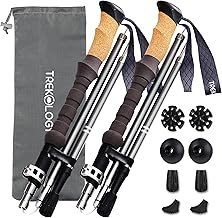
| Nordic Lightweight 7075 Aluminum | 7075 aluminum | External flick-lock | ~26 in | Glacier approaches, durable everyday use |
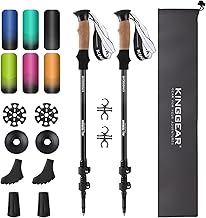
| TREKOLOGY Trek-Z Cork Grip | Aluminum | Z-fold + push-button | ~15 in | Fly-in trips, ski-mountaineering stow-away |
| Collapsible Aluminum 2-Pack | Aluminum | Twist-lock telescoping | ~25 in | Budget rope-team partner setup |
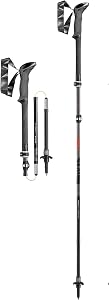
Best all-around: Nordic Lightweight 7075 Aluminum Trekking Poles
The 7075 alloy is the sweet spot for glacier travel: light enough not to fatigue your shoulders on a 12-hour summit push, but strong enough to take a sideways load when you brace against a slip on hard crust. The external flick-lock keeps working when your fingers are too cold to feel them, and the shaft length range covers steep ascents through long descents. Pair these with aftermarket 90mm snow baskets and you have a serious approach pole. Check current price on Amazon.
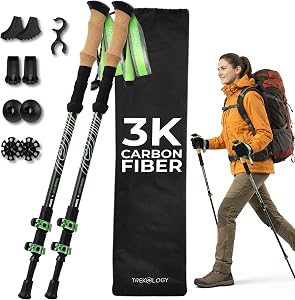
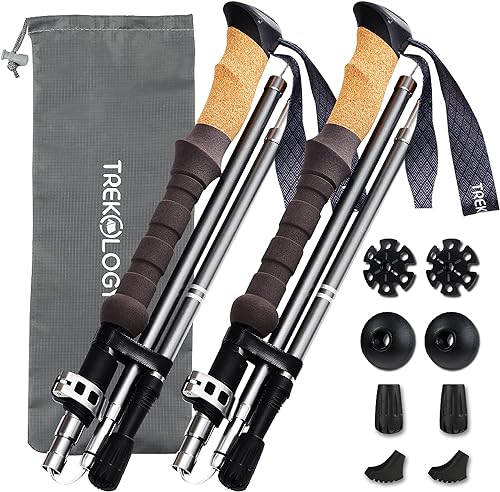
Best for packability: TREKOLOGY Trek-Z Cork Grip Folding Trekking Poles
Z-fold poles collapse to roughly 15 inches—short enough to fit inside a 35-liter summit pack when you need to stow them mid-route and switch to your ice axe. The cork grip resists the cold-soak that plastic grips suffer at altitude, and the push-button deploy is fast even with gloves. The trade-off is the folded geometry: Z-poles are slightly less rigid than telescoping aluminum under hard side-loads, so treat them as approach-and-summit-day tools rather than aggressive bracing aids. View on Amazon.
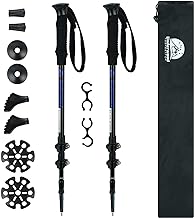
Best budget rope-team set: Collapsible Aluminum Trekking Poles, 2-Pack
If you are outfitting a glacier-school rope team or just need a backup pair for a partner who showed up empty-handed, the 2-pack is hard to beat on dollar-per-pole math. The twist-lock telescoping shafts demand more attention—keep them clean, dry, and torqued correctly—but they hold fine on low-angle approaches. Treat these as your loaner glacier poles rather than your primary summit-day setup. See the 2-pack on Amazon.
Technique: using poles on a glacier step by step
1. Setup before you step onto the snow
Lengthen each pole 5–10 cm beyond your normal flat-ground setting to account for soft snow penetration. Swap to snow baskets. Loop the wrist strap loosely or skip it entirely on crevassed terrain so you can ditch the pole instantly if you fall in.
2. Probing for hidden crevasses
On suspect snow bridges, plant each pole firmly and full-shaft before stepping. A sudden drop—no resistance for the full pole length—is the warning sign. This is not a substitute for a dedicated avalanche probe, but it catches a lot of obvious slot edges before you commit weight.
3. The wide-stance brace
When crossing a bridge or moving over icy crust, widen your pole plants and lower your hips. The geometry gives you four points of contact instead of two, and your center of gravity drops. If a foot blows out, your braced poles can buy you the half-second needed to redirect onto solid snow.
4. Partial post-hole recovery
If one leg breaks through into a small slot, drive both poles laterally to either side of the hole, lock your elbows, and shift weight onto the poles while you extract the leg. This is the most common real-world "self-arrest with poles" scenario—and it works because the load is mostly vertical, not a horizontal slide.
5. The hand-over-hand emergency stop
On a low-angle slide, drop into a face-down position and drive the pole grips—not the tips—into the snow with both hands stacked, exactly as you would with the head of an ice axe. The grips give you more surface area than the carbide tip. This will not stop you on hard ice or steep snow, but on consolidated soft snow at low angles it can shave enough speed to let your rope team catch you.
What to carry alongside poles
Poles complement, not replace, the rest of the kit. A typical glacier day in 2026 looks like:
- One real mountaineering ice axe (carried, ready to deploy)
- Glacier rope, harness, prusiks, two locking carabiners, pulley
- Crampons matched to your boots
- Helmet
- Trekking poles with snow baskets for approach, descent, and low-angle terrain
For a deeper look at the rest of the kit, see our glacier travel gear checklist and our breakdown of when to switch from poles to an ice axe.
Maintenance after a glacier day
Glacier snow is dirtier than people expect—grit, sunscreen, glacial flour. Disassemble your poles, rinse the shafts in clean water, wipe down the locks, and air-dry overnight before storing collapsed. Twist locks especially need clean threads or they will slip the next time you load them. Check the carbide tips for chips; a chipped tip skates on ice instead of biting. Replacement tips cost a few dollars and screw on in two minutes.
Frequently Asked Questions
Can trekking poles really stop a fall into a crevasse?
No. Once you are in free fall into an open crevasse, only your rope team and your prusik system stop you. Poles can help prevent the fall in the first place by probing snow bridges and catching partial post-holes, but they are not a fall-arrest device.
Should I use one trekking pole and one ice axe on a glacier?
Yes, this is a widely taught configuration for moderate glacier terrain. The pole goes in your downhill hand for balance; the ice axe goes uphill in self-arrest grip. As the angle increases, you stow the pole and switch to two-handed axe technique.
Are carbon trekking poles okay for glacier travel?
Generally no, not for serious glacier work. Carbon shafts are stiff and light but can shatter without warning under lateral loads—exactly the loads you generate when bracing against a slip on ice. Aluminum shafts bend before they break, giving you warning. Most guides recommend aluminum for any technical snow travel.
What size snow basket do I need for glacier trekking poles?
Aim for 90–100mm diameter. Standard 50mm trekking baskets sink too deeply into soft glacier snow to brace against. Most quality poles accept aftermarket snow baskets that twist on in seconds.
Do I need to remove the wrist straps on a glacier?
On terrain with real crevasse hazard, yes—or at least loosen them so you can ditch the pole instantly. A pole strapped to your wrist when you punch through a snow bridge becomes a lever that can dislocate your shoulder. On low-angle glacier approaches with low crevasse hazard, normal strap use is fine.
How long should my trekking poles be for glacier travel?
Slightly longer than your flat-ground setting—typically 5–10 cm longer—because the tip sinks into snow. Many glacier travelers run 115–125 cm. Adjustable poles make this easy; fixed-length poles do not, which is why we don't recommend them for mixed terrain.
Are folding Z-poles or telescoping poles better for mountaineering?
Z-fold poles like the Trek-Z pack shorter—critical when you need to stow them inside a summit pack and switch to an ice axe. Telescoping poles are slightly more rigid and adjust over a wider length range. For approach-heavy routes telescoping wins; for technical days with frequent stow-and-deploy cycles, folding wins. See our folding vs telescoping comparison for the full breakdown.
Bottom line
Trekking poles are a force multiplier on glacier approaches and low-angle snow travel, but they are not magic. Use them to probe, balance, brace, and slow partial slips. Carry an ice axe for everything else. Choose aluminum over carbon, big snow baskets over standard ones, and locks that work with cold gloves. Get those four things right and your poles will do their job for years of glacier seasons.
Key Takeaways
- Choosing the right trekking poles for glacier travel crevasse self-arrest means matching capacity and output ports to your actual devices
- Always check actual watt-hours (Wh), not just watts — runtime depends on Wh, not peak output
- Also covers: glacier hiking trekking pole technique
- Also covers: crevasse arrest with poles
- Also covers: mountaineering pole self arrest
- Compare price-per-Wh across models to find the best value for your budget