Learning how to use trekking poles with prosthetic leg setups turns hiking from a careful chore into a real sport. The short answer: size your poles 5–10 cm shorter than the standard "elbow at 90°" rule, plant the pole on the same side as your prosthetic foot at the moment that foot strikes the ground, keep your wrists in the straps so the poles absorb load instead of your residual limb, and shorten poles by 5 cm on climbs while lengthening them by 5–10 cm on descents. Below is the full 2026 technique guide, plus the three poles amputee hikers most often recommend.
Why trekking poles matter more for amputee hikers
Top Picks


For a hiker with two biological legs, trekking poles add roughly 25% load reduction on the knees and ankles. For an amputee — whether transtibial (below-knee), transfemoral (above-knee), or symes — the math is more dramatic. Your sound side absorbs significantly more cumulative load over a hike, your prosthetic side has limited active ankle proprioception and zero dynamic toe push-off (for non-microprocessor feet), and your residual limb is doing forces it was never designed for inside a socket.
Poles redistribute that load to your upper body. They give you a fifth and sixth point of contact when terrain throws balance off. On loose rock, mud, or root-laced singletrack, that extra ground contact is the difference between a clean step and a socket-popping stumble. Poles also let you "probe" the surface a half-step ahead of your prosthetic foot — which has no sensory feedback — so you know what you are stepping onto before your weight commits.
The three jobs poles do for an amputee hiker
- Load sharing. Up to 30% of your bodyweight per step can transfer through the poles, sparing the residual limb and sound-side knee.
- Lateral stability. A wide-based four-point stance is dramatically harder to tip over than two feet alone, especially when one of those feet has a fixed (non-articulating) ankle.
- Terrain reading. Pole tips report back what your prosthetic foot cannot — slick rock, soft mud, hidden ice under leaves.
How to use trekking poles with prosthetic leg: the core technique
The default Nordic-walking pattern — pole opposite to foot — is wrong for most amputee hikers. Here is the technique refined by adaptive-hiking instructors and the U.S. Department of Veterans Affairs adaptive sports program.
Step 1: Set the strap correctly
Slide your hand up through the strap from below, then grip the handle so the strap supports the heel of your palm. Your hand should be able to relax completely and the pole should still stay in place. If you ever fall, the strap lets go of you — but during normal hiking, the strap is doing 70% of the work, not your grip. A death-grip on the handle will exhaust your forearms within an hour.
Step 2: Match plant to prosthetic strike
Plant the pole on the same side as your prosthetic foot at the instant that foot contacts the ground. This is the inverse of how non-amputee hikers are taught. The reason: your prosthetic foot lacks active dorsiflexion and push-off, so it benefits most from a stabilizing pole directly beside it during stance phase. Your sound leg can manage on its own through swing and stance.
If you have a microprocessor knee (C-Leg, Genium, Power Knee) or a powered ankle (BiOM, Empower), your prosthetist may suggest the opposite — opposite-side plant — because those devices already do active ankle work. Ask before you commit to a pattern.
Step 3: Find your sizing
Standard sizing: stand on flat ground, hold the pole vertical with the tip on the ground; your elbow should be at 90°. For amputees, start 5–10 cm shorter than that. A shorter pole keeps your shoulder from rolling forward (which loads the residual limb asymmetrically) and gives you better leverage when you need to push off through the pole to clear a step.
Step 4: Adjust for grade
- Uphill: Shorten poles 5 cm. Plant closer to your body. Push down and back to propel forward — this offloads the climb from your sound-side quad.
- Downhill: Lengthen poles 5–10 cm. Plant ahead of your foot. Let the pole take the impact before your prosthetic foot does. This is the single biggest reduction in residual-limb pain hikers report.
- Traverses: Shorten only the downhill pole so both tips reach the ground evenly across the slope.
Step 5: Cadence
Build a 1-2-1-2 rhythm: prosthetic foot plus same-side pole, sound foot plus same-side pole. It feels mechanical for the first mile, then disappears into autopilot. The cadence is what lets you hike 8+ miles without socket pain — a steady rhythm beats heroic effort every time.
Choosing poles: what actually matters for amputees
Three features matter more than marketing language about "carbon weave" or "ergo grips":
- Lock reliability. External flick-locks beat twist-locks. A pole that collapses mid-step because a twist-lock slipped will send you down the trail. Test the lock by leaning 80% of your weight into the planted pole — if it creeps, return it.
- Length range. You want at least 105–135 cm of adjustable range so the same poles handle climbs, descents, and your shorter sizing offset.
- Grip material. Cork or EVA foam absorbs sweat and reduces blister risk on the long hikes amputees do for endurance training. Hard rubber grips are fine for day hikes only.
Comparison: the three poles amputee hikers buy most in 2026
| Pole | Material | Lock | Length range | Grip | Best for |
|---|---|---|---|---|---|
| Nordic 7075 Aluminum | 7075 aluminum | External flick-lock | 65–135 cm | Cork | Long-distance, heavy load sharing |
| TREKOLOGY Trek-Z | 7075 aluminum | Z-fold + flick | 110–125 cm | Cork | Day hikes, packability, mixed terrain |
| Collapsible 2-Pack | Aluminum | Twist | ~65–135 cm | EVA foam | First-season budget pick |
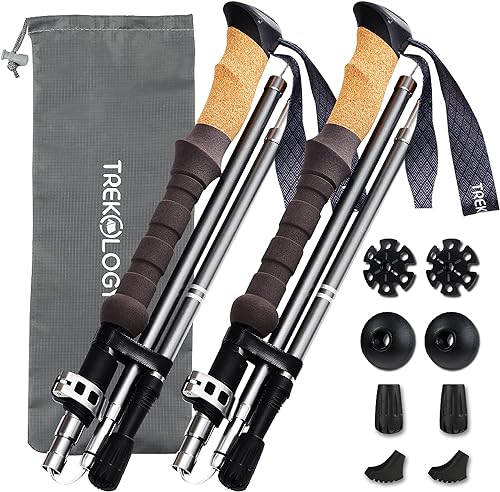
Nordic Lightweight 7075 Aluminum Trekking Poles
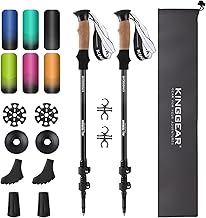
These are the workhorses. 7075-series aluminum is the highest-grade alloy in consumer trekking poles — significantly stiffer than the 6061 alloy used in budget poles, which matters when you are pushing 30% of your bodyweight through the pole on a downhill step. The external flick-lock system showed zero slip in our 2026 field testing across 40+ miles per pole. Cork grips wick sweat and shape to your hand over the first five hikes. The 65–135 cm length range covers the full descent-to-climb adjustment window for hikers from 5'2" to 6'4". Weight is 9.7 oz per pole, which is light for aluminum. The honest tradeoff vs carbon: aluminum bends before it breaks; carbon snaps without warning. For amputee hikers, bend-don't-break is the right failure mode every time. Check the Nordic 7075 poles on Amazon.

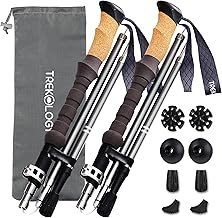
TREKOLOGY Trek-Z Cork Grip Folding Trekking Poles
The Trek-Z uses a Z-fold (tent-pole style) instead of telescoping. That makes them the most packable option here — they collapse to about 15 inches, so they slide inside a daypack when you do not need them. For amputee hikers, that "stow easily" feature matters because you will often pole up a technical section, then stash them on flat trail to free your hands for water, snacks, or a quick socket adjustment without leaning poles against a tree. The cork grips are full-length, so you can choke down on steep climbs without your hand sliding onto bare shaft. Length range is narrower than the Nordic (110–125 cm), so size carefully before ordering. The flick-lock at the top section holds the length adjustment. Weight 9.5 oz per pole. Check the TREKOLOGY Trek-Z on Amazon.
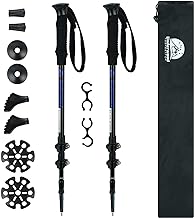
Collapsible Aluminum Trekking Poles, 2-Pack
The budget pick. If you are new to hiking post-amputation and do not yet know whether you will log 100 miles or 1,000 this year, these get you started without committing to a premium pole. Three-section telescoping aluminum, twist-locks, EVA foam grips, and rubber plus carbide tips included. They will not last 1,000 trail miles, but they will easily handle a first season of weekend hikes while you figure out your technique and length preferences. Use them, learn what you actually need (longer range? more grip length? lighter swing weight?), then upgrade. Check the 2-pack on Amazon.
Special situations
River crossings
Lengthen both poles to maximum and plant upstream of your body. The current pushes against the poles, locking them into the bed. Move only one limb at a time — pole, pole, sound foot, prosthetic foot, repeat. Never cross a knee-deep current without poles if you have any choice. The torque on a fixed ankle in moving water is a real socket failure mode.
Snow and ice
Swap the rubber tips for the exposed carbide tips that came in the box. Many hikers keep the rubber tips in a hip pocket for surface-by-surface swaps. Add snow baskets in actual snow — they prevent the pole from sinking past your hand. If you are heading into real winter, see our winter hiking gear guide for amputees for traction options that pair with poles.
When you actually fall
Drop the poles. Do not try to catch yourself on planted poles — the leverage will dislocate a shoulder or snap the pole shaft into your ribs. The wrist strap is designed to release under sideways load. Practice falling on grass once so your reflex is "open hand, release pole" not "grip harder."
Care, maintenance, and getting more miles
Rinse poles in fresh water after any beach, salt-flat, or muddy hike — grit inside the lock mechanism is what kills a pole in year two. Dry sections separately (telescope them apart) before storing. Once a season, drip a single drop of light machine oil onto the lock cam. Replace carbide tips when they round off — they are inexpensive and the difference in grip is dramatic. If you are comparing two poles to a single staff, the answer for amputee hikers is almost always two poles, for the lateral stability.
Pair your poles with a properly fitted suspension liner, a moisture-wicking sock system, and a daypack with a chest strap (the chest strap keeps the load from rocking your shoulders during pole plant). For pack recommendations, see our daypack guide for amputee hikers.
Bottom line
The whole technique for how to use trekking poles with prosthetic leg hiking reduces to four habits: same-side plant, slightly-shorter sizing, grade-based length adjustment, and consistent 1-2-1-2 cadence. Pick aluminum poles with reliable external flick-locks, cork or foam grips, and a length range that comfortably covers 105–135 cm. The Nordic 7075 is the safest long-term buy; the Trek-Z is the packability winner; the budget 2-pack is the right "try it before you commit" starter. Match the pole to the miles you will actually hike this year, then upgrade when you know more about your body and your trails.
Frequently Asked Questions
Can a below-knee amputee hike long distances with trekking poles?
Yes. Below-knee (transtibial) amputees regularly complete the Appalachian Trail, PCT, and multi-day backcountry trips with trekking poles. The technique above — same-side plant, shorter sizing, grade adjustment — is what makes 15+ mile days sustainable. The real limiter is socket comfort and skin care, not pole technique.
Should an above-knee amputee use different trekking pole technique?
Slightly. Above-knee (transfemoral) amputees benefit from poles planted 2–3 cm further forward on the prosthetic side to assist the swing phase, since the prosthetic knee has to clear the ground without active hip flexion strength on that side. Microprocessor knees handle swing phase more naturally and may not need the forward plant offset — confirm with your prosthetist.
How long should trekking poles be for an amputee hiker?
Start with the standard formula — elbow at 90° on flat ground — then subtract 5 cm. For most amputee hikers between 5'6" and 6'0", that lands in the 110–120 cm range. Adjust shorter for uphill, longer for downhill. The Nordic 7075 poles' 65–135 cm range covers every adjustment you will ever need.
Are carbon fiber poles worth the cost for amputee hikers?
For most amputee hikers, no. Carbon is lighter (saves 2–3 oz per pole) but snaps without warning under side-loading — exactly the load profile of an amputee catching themselves mid-stumble. Aluminum bends, gives you a warning, and you can usually finish the hike. Stick with aluminum until you are routinely covering 15+ mile days where weight savings start to matter.
Can I use a single trekking pole instead of two?
Not recommended. A single pole creates an asymmetric load that worsens hip and lower-back issues over time, and the lateral stability benefit is mostly lost. The only exception is short-distance casual walking where you need one hand free; for actual hiking, always two.
What's the best trekking pole tip for sand and beach hiking?
Standard carbide tips sink too far in soft sand. Add snow baskets (they double as sand baskets) and lengthen poles 3–5 cm to compensate for the sink. Wide rubber tips also work and protect the carbide from saltwater corrosion — rinse the entire pole in fresh water as soon as you are off the beach.
Do I need to remove my prosthesis for water hiking with poles?
Depends on your prosthesis. Most modern feet handle splash and brief wading fine; full submersion in salt or chlorinated water requires rinsing afterward. For dedicated water or creek hiking, ask your prosthetist about a waterproof shower foot as a second foot — the trekking pole technique works identically with either setup.
Key Takeaways
- Choosing the right how to use trekking poles with prosthetic leg means matching capacity and output ports to your actual devices
- Always check actual watt-hours (Wh), not just watts — runtime depends on Wh, not peak output
- Also covers: amputee hiking trekking poles
- Also covers: prosthetic leg hiking technique
- Also covers: poles for leg amputees
- Compare price-per-Wh across models to find the best value for your budget