The best hiking backpack for colostomy bag wearers in 2026 is one with a load-lifting harness, adjustable sternum strap, ventilated back panel, and most critically a hip belt that either rides high above the stoma site or splits to clear it entirely. Look for dual-density foam wings, micro-adjustable pivots, and a belt that can sit 2 to 3 inches above the iliac crest so it never presses across an ostomy appliance. Below we cover sizing, hip-belt geometry, trail-tested complementary gear like trekking poles that offload pelvic pressure, and the exact features that matter when planning a multi-day hike after ostomy surgery.
Why hip belt geometry matters more than pack volume
Top Picks


Pack capacity is the spec most hikers obsess over, but for ostomates it is downstream of one thing: where the belt rides and how it pivots. A standard hip belt parks its load directly on the iliac crest, which on most ostomy patients is one to four centimeters from the stoma. Even a perfectly fitted 35L daypack will compress an appliance flange if the belt is rigid, low-slung, or non-conforming. The result is the worst-case trail scenario, a belt seal failure miles from any privacy.
What you want instead is a belt that articulates independently of the lumbar pad, with enough rise to be cinched above the stoma, or enough drop to sit beneath it on a lower-mounted output site. Some hikers cut a vertical relief channel in the foam; we do not recommend modifying belts that are still under warranty. Better to choose a pack designed with a separable or contoured belt from day one and pair it with poles that reduce the vertical compression load.

Key features to look for in a colostomy-friendly hiking pack
- High-rise or split hip belt: The belt should be adjustable enough to clear your stoma site by at least one finger-width without losing load transfer.
- Dual-density foam wings: Soft inner layer against the skin, firmer outer layer for stability. This reduces hot-spot pressure on irrigation appliances.
- Removable lumbar pad: Some packs ship with a swap-out lumbar bump that lets you tune ride height by half an inch.
- External quick-access pouch: For ostomy supplies, wipes, and a sealed waste bag, you want grab-it-without-stopping access.
- Ventilated mesh back panel: Heat against an appliance shortens wear time. A trampoline-style back keeps the flange cooler.
- Load lifters at 45 degrees: Properly angled lifters pull weight off the hip belt and onto the shoulders during steep climbs, which is exactly when belt pressure on the stoma spikes.
- Hydration sleeve, not bladder-on-belt: Side-bottle holsters are fine, but avoid waist-mounted hydration setups that sit on or near the appliance.
For deeper buying advice on related gear, see our guides on ultralight hip belt conversions and best daypacks for medical conditions.
Why trekking poles belong in any ostomy hiker's kit
Here is the under-discussed truth: the single most effective accessory for the best hiking backpack for colostomy bag users is a pair of trekking poles. Studies on biomechanics consistently show that proper pole use transfers roughly 20 to 25 percent of vertical load away from the hips and knees and into the upper body. For an ostomate, that is 20 to 25 percent less downward pressure squeezing the hip belt against the stoma flange on every step.
Poles also help on uneven terrain, where lateral hip torque is what usually breaks an appliance seal. A stable four-point stance means less rotational shear at the waistline. If you are recovering from surgery and rebuilding core strength, poles bridge the gap until your stabilizers catch up.
Trekking pole comparison for ostomy-aware hikers
| Model | Material | Mechanism | Best use case | Weight per pair |
|---|---|---|---|---|
| Nordic Lightweight 7075 Aluminum | 7075-T6 aluminum | Telescoping | Multi-day with heavy belt offload | ~1.1 lb |
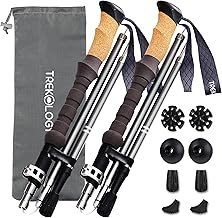
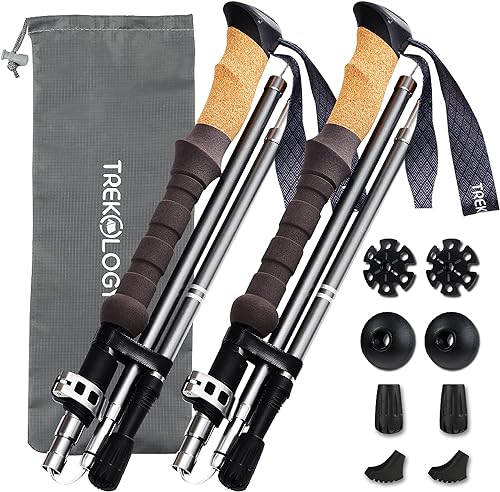
| TREKOLOGY Trek-Z Cork Grip | Aluminum, cork grip | Z-fold collapsible | Day hikes, packable on plane travel | ~1.0 lb |
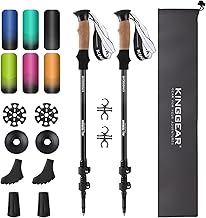
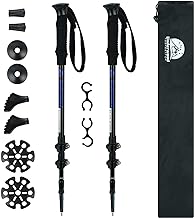
| Collapsible Aluminum 2-Pack | Aluminum | Telescoping | Beginner ostomy hikers, budget | ~1.2 lb |
Nordic Lightweight 7075 Aluminum Trekking Poles
The 7075-T6 aluminum used in these poles is the same alloy used in aircraft structural components, which means you can lean hard on them on a descent without flex or buckling. For ostomy hikers, that stiffness translates to confident weight transfer on every plant: load that would otherwise compress your hip belt is instead redirected up through the pole shaft and into your shoulders and arms. The telescoping design lets you shorten them by 5 to 10 cm for climbs (which keeps your torso more upright and reduces abdominal compression against the appliance) and extend them on descents. A solid year-round choice that holds up to repeat trips. Check current price on Amazon.
TREKOLOGY Trek-Z Cork Grip Folding Trekking Poles
The Trek-Z is the Z-fold design that collapses to roughly 15 inches, which matters more than people realize for the post-surgery hiker who is also flying to trailheads. They slide inside a 40L hiking backpack without requiring external strap mounts, so you do not end up with pole tips dangling near your hip belt while you walk to the gate. The cork grip is the other reason to pick them: cork wicks sweat and stays grippy in humidity, which means less micro-adjusting of your hand position during a long climb. Less hand fiddling equals more consistent load offload, which equals more consistent hip belt pressure on your appliance. Check current price on Amazon.
Collapsible Aluminum Trekking Poles, 2-Pack
If you are testing whether poles will actually help with your appliance pressure problem before committing to a premium set, this 2-pack is the right entry point. It gives you a working pair at a price that does not penalize you if you decide to upgrade later. The telescoping aluminum construction is more than adequate for day hikes and weekend backpacking trips, the wrist straps are adjustable enough to take pressure off your palms (important if you are still rebuilding grip strength after surgery), and the tip baskets swap for snow use. Pair them with a high-rise hip-belt pack and you have a workable kit for under one hundred dollars. Check current price on Amazon.
How to size your hiking backpack post-surgery
Torso length, not waist size, dictates pack fit. Measure from your C7 vertebra (the bump at the base of your neck when you tip your head forward) down to the top of your iliac crest. Most ostomy hikers should then add half an inch to one inch to that measurement when selecting torso size, because you will be wearing the belt higher than a typical hiker to clear the stoma. This means a person who would normally fit a medium frame often needs a large.
Capacity-wise, start smaller than you think. A 28 to 35 liter pack covers day hikes plus a full ostomy supply kit (extra pouches, adhesive remover wipes, disposal bags, barrier rings, and a change of clothes). Jumping straight to a 65L expedition pack overloads a still-healing core and forces the belt down into the stoma zone. Build distance and load gradually.

Packing strategy for ostomy supplies on trail
Keep a quick-access pouch on the shoulder strap or in a hip-belt pocket on the opposite side from the stoma. This pouch should hold one full pouch change kit plus disposal bag and wipes. Your main compartment holds a backup kit (two more changes) inside a small dry bag, because nothing destroys an adhesive faster than condensation off a wet rain jacket. Always carry one full extra change of underwear and one shirt, vacuum-sealed, even on day hikes.
For multi-day trips, store irrigation supplies in a separate dry bag near the top of the pack so you can deploy at camp without unpacking the whole load. If you are using a hydration bladder, route the hose on the side opposite your stoma to keep the bite valve away from your appliance when you bend forward.
Trail timing and irrigation schedule
If you irrigate, schedule trail starts to land between irrigation and peak output. Most hikers in the ostomy community plan a 60 to 90 minute window after irrigation before hitting the trailhead. This minimizes the chance of needing to change pouches at a viewpoint with no privacy. For colostomy bag wearers who do not irrigate, the morning-coffee-then-hit-trail rhythm works for most. Hydrate aggressively, but plan rest stops every 90 minutes to check seal integrity.
For more on planning, our piece on long-distance hiking medical prep walks through full pre-trip checklists.
Frequently Asked Questions
What is the best hiking backpack hip belt design for ostomy patients?
The best hip belt design for ostomy patients is a high-rise, articulated belt with dual-density foam and a soft inner layer that conforms to the abdomen without rigid edges. Belts that can ride above the iliac crest by an inch or two are ideal because they clear the stoma site entirely. Look for belts with independent pivoting wings rather than a single straight band; they distribute load through the hips without pressing across the appliance flange.
Can I use a regular hiking backpack with a colostomy bag if I loosen the hip belt?
You can, but it is not the best long-term setup. A loose hip belt transfers all the weight to your shoulders, which fatigues you faster and increases neck and upper back strain. A better approach is to pick a pack with a belt designed to ride above your stoma and tighten it normally there. Many ostomates find that a pack with a properly fitted high-rise belt is more comfortable than a low-rise belt loosely worn.
Do trekking poles really reduce hip belt pressure on a stoma?
Yes. Biomechanical research consistently shows that proper trekking pole use transfers 20 to 25 percent of vertical load off the lower body and into the arms and shoulders. For ostomates, that is a measurable reduction in the downward force compressing the hip belt against the appliance. Poles also stabilize lateral motion on uneven terrain, which reduces the rotational shear that often breaks adhesive seals.
What pack volume is best for a day hike with ostomy supplies?
A 28 to 35 liter pack is usually the sweet spot. It accommodates a full ostomy supply kit (extra pouches, wipes, barrier rings, disposal bags, and a spare set of clothes), plus standard day hike essentials like water, food, layers, and first aid. Smaller packs force you to leave behind backup supplies, which is risky. Larger packs tempt you to overpack, which forces the hip belt down toward the stoma.
How do I prevent appliance leaks while hiking in hot weather?
Heat and sweat are the two enemies of adhesive. Choose a pack with a ventilated trampoline-style back panel so air flows between your back and the pack. Apply a barrier ring or extender around the flange before you start. Carry a small towel to dab sweat from around the appliance edge during rest stops. Schedule the hardest climbs for cooler morning hours when possible.
Are folding trekking poles better than telescoping poles for ostomy hikers?
Folding (Z-fold) poles like the TREKOLOGY Trek-Z collapse smaller, which means they pack inside your bag rather than dangling off external straps near your hip belt. That keeps pole tips and joints from rubbing against your appliance. Telescoping poles like the Nordic 7075 set offer slightly more on-the-fly length adjustment, which matters more on terrain with constantly changing grade. Both work; folding wins on packability, telescoping wins on adjustability.
What should I look for in a hip belt pocket for ostomy supplies?
The hip belt pocket should be on the side opposite your stoma, hold at least one full pouch change kit, and zip closed against trail dust. Stretch mesh pockets are not adequate because they let supplies bounce loose. A water-resistant zip pocket sized for a 4x6 inch supply kit is ideal. Some hikers add a small dry bag inside the pocket for an extra moisture barrier.
Key Takeaways
- Choosing the right best hiking backpack for colostomy bag means matching capacity and output ports to your actual devices
- Always check actual watt-hours (Wh), not just watts — runtime depends on Wh, not peak output
- Also covers: ostomy friendly hiking pack
- Also covers: backpack with adjustable hip belt ostomy
- Also covers: colostomy hikers backpack
- Compare price-per-Wh across models to find the best value for your budget