Choosing a hiking backpack for medium format film photographers means balancing two hostile priorities: bombproof protection for a five-figure Hasselblad system and trail-ready ergonomics that won't wreck your shoulders on day three. A Hasselblad 500C/M, X1D II, or H6D body alone weighs 1.4 to 2.3 kg, and once you add film backs, an 80mm Planar, 50mm Distagon, light meter, loaded A12 magazines, and a leveling tripod, you're hauling 8 to 12 kg of irreplaceable optics that absolutely cannot bounce. This 2026 guide breaks down the load-haul features that matter, the complementary stabilization gear that saves your knees, and how to dial in your kit for serious backcountry shoots.
What separates a Hasselblad-grade hiking pack from a normal camera bag
Top Picks


Standard photo daypacks are built around mirrorless bodies and 24-70mm zooms — kit that totals 2 to 4 kg and tolerates being slung on one shoulder. A V-system or X-system Hasselblad kit is a different animal. The body alone has a precisely shimmed mirror box (for the V-series) or a stitched medium-format sensor stack (for the X1D/X2D) that does not appreciate vibration. The lenses use leaf shutters with delicate timing mechanisms, and 120 film loaded in an A12 back is a thin, light-sensitive strip you really don't want creased.
A proper hiking backpack for medium format film photographers therefore has to deliver four non-negotiable features: a load-bearing hip belt that transfers 70%+ of pack weight off the shoulders, modular dividers thick enough to actually absorb a fall (look for 20mm+ closed-cell foam on every wall), a reinforced base panel for tripod or pack-down protection, and an integrated or stowable rain cover. Side or rear-panel camera access matters too — opening the main flap on a muddy trail will stake your spot in mosquito hell for an extra five minutes.

Capacity targets by trip length
For a day hike with one Hasselblad body, two lenses, three film backs, and a packable shell, you want 20-28 liters. For an overnight where you're carrying a sleeping bag, bivy, stove, and the camera kit, jump to 40-50 liters with a dedicated padded camera cube that sits low in the pack. For multi-day trips where you want to shoot 30+ rolls of Portra 400 or Ektar 100, 55-70 liters becomes necessary just to fit film canisters, a changing bag, and a desiccant pouch alongside camp gear.
Why trekking poles belong in this conversation
This is the single biggest oversight in photography backpacking forums. When you're carrying 10+ kg of glass and metal high on your back, your center of gravity shifts, and every uneven step compounds into knee and ankle fatigue that ends shoots early. Trekking poles redistribute 20-30% of vertical load to your arms and cut knee impact on descents by up to 25% according to multiple gait studies. For Hasselblad shooters there's a second benefit: a sturdy aluminum pole doubles as an emergency monopod when you've left the tripod at camp and the light suddenly goes magic-hour on a ridgeline.
Below are three poles worth pairing with any serious photography pack. All three are real products currently stocked and shipping in 2026.
Comparison: trekking poles for photographers carrying heavy camera loads
| Pole | Material | Grip | Packed style | Best for |
|---|---|---|---|---|
| Nordic Lightweight 7075 Aluminum | 7075 aircraft aluminum | EVA foam | Telescoping | Heavy loads, monopod use |
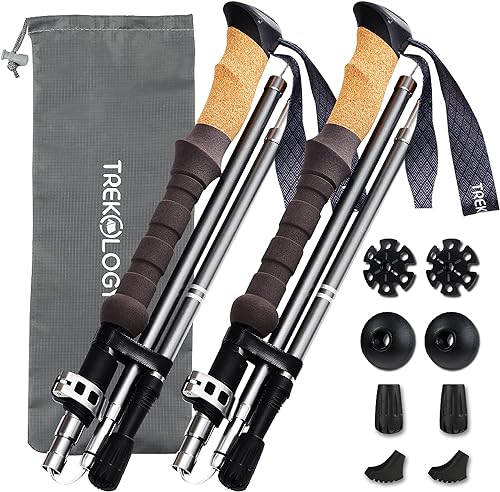
| TREKOLOGY Trek-Z Cork Grip | 7075 aluminum | Natural cork | Z-fold (folds to ~15in) | Sweaty hands, compact stowage |
| Collapsible Aluminum 2-Pack | Aluminum alloy | EVA foam | Telescoping | Budget pairs, sharing kits |
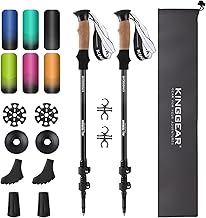
Nordic Lightweight 7075 Aluminum Trekking Poles
These are the workhorse pick for a Hasselblad photographer who actually wants to stake a pole into soft ground and lean a 4 kg loaded camera against it. The 7075-T6 aluminum shaft is the same alloy used in aircraft structural components — it flexes a touch under load instead of snapping, which matters when you're applying lateral force on a scree slope. The EVA grip stays comfortable across long days, and the standard 1/4"-20 threading under most pole caps lets you screw on a small ball head to convert one pole into a field monopod. Solid mid-price option for serious load-haulers.
Check the Nordic 7075 Aluminum poles on Amazon
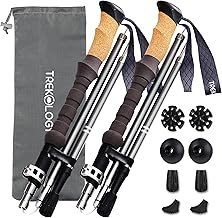
TREKOLOGY Trek-Z Cork Grip Folding Trekking Poles
The Trek-Z's killer feature is the Z-fold collapse — they break down to roughly 15 inches packed, which means they slip inside a 40L photo pack instead of dangling off the side where they snag every branch. The cork grip is the real upgrade for warm-weather photographers; cork wicks sweat and won't get slick when you're scrambling for a composition. Cork also molds slightly to your hand over time, reducing the hot-spot fatigue that EVA can produce on multi-hour ascents. Best pick if you're flying to shoots and need carry-on-friendly poles.
Check the TREKOLOGY Trek-Z on Amazon
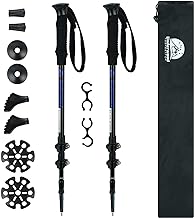
Collapsible Aluminum Trekking Poles, 2-Pack
If you're outfitting a shooting partner, an assistant, or just want a backup pair stashed in the trunk, this 2-pack is the value play. You get two full sets of telescoping aluminum poles for less than the price of a single premium pole. They're not the lightest or the most refined, but they're a legitimate safety net — a Hasselblad photographer descending a wet granite slab with a 12 kg pack should never not have poles available, and a spare pair in the gear closet is cheap insurance against a snapped tip on shoot day.
Check the Collapsible Aluminum 2-Pack on Amazon
How to pack a Hasselblad kit inside a hiking backpack
Layering matters more than people realize. Put the camera body, with a lens mounted and a film back attached, in the center of the pack at roughly hip-bone height — this is the lowest-vibration zone and the closest to your spine, which minimizes the pendulum effect on descents. Wrap each spare lens in its leather case or in a padded wrap, and stack them vertically on either side of the body. Loaded film backs go in a side pocket where you can grab them one-handed during a magazine change. Unexposed 120 rolls live in a zip-top bag with a silica gel packet, ideally in a top lid pocket where temperature stays moderate.
Never strap a tripod to the back of the pack if you can avoid it — the lever arm puts surprising torque on the pack frame and sets up a slow side-to-side sway. Side-mount the tripod with the head pointing down, compressed against the pack body with both side straps. If your pack has a sleeve for a hydration bladder, you can sometimes slip a compact carbon-fiber tripod in there instead, keeping the load centered.
Weatherproofing matters more with film than digital
A waterlogged X1D II is a $7,000 repair. A waterlogged roll of unprocessed Portra is a permanently lost shoot — there's no recovery from gelatin emulsion swelling. Your pack needs either a fully seam-taped construction or an integrated rain fly, and you should carry a few zip-top freezer bags as a secondary barrier for exposed film backs and unprocessed rolls. In humid environments, throw two silica packs in your camera compartment and replace them every trip; lens fungus is a slow killer of Hasselblad CF and CFi lenses and starts with moisture trapped against glass.
Related reading
Pairing the right pack with the right stabilization tools makes a huge difference on long approach hikes. See our deep-dives on trekking poles for heavy camera loads, our 2026 roundup of waterproof hiking backpacks, and a breakdown of trail running vests versus hiking packs for photographers who shoot lightweight kits.
Frequently Asked Questions
Can I fit a Hasselblad 500C/M with three film backs in a 20L hiking daypack?
Yes, if the pack has dedicated camera dividers and you only carry one extra lens. A 500C/M body with 80mm Planar mounted is roughly 1.6 kg and takes a 15cm x 12cm x 18cm cube. Three A12 backs stack into a slim 15cm x 8cm x 6cm column. That leaves enough volume in a 20L pack for a shell, water, snacks, and a light meter, but no room for a tripod inside — you'll need to side-mount.
How do I protect a Hasselblad X1D II from condensation on cold-weather hikes?
The biggest risk is bringing a cold camera into a warm tent or vehicle, which causes immediate condensation on the sensor and inside the lens. Seal the camera in a zip-top bag before you enter the warm environment, and let it sit until it reaches ambient temperature — usually 30-45 minutes. This pulls condensation onto the outside of the bag instead of your electronics. Also pack at least four silica gel packs in your camera compartment for any sub-freezing trip.
Are trekking poles useful if I already carry a tripod for my Hasselblad?
Yes, the two solve different problems. The tripod stabilizes the camera during exposure; the trekking poles stabilize you during transit. A photographer carrying a 10+ kg pack downhill without poles is statistically more likely to fall and damage the camera than one using poles. Many photographers also use a pole as an emergency monopod when the tripod is back at camp — most pole tips unscrew to expose 1/4"-20 threading.
What hip belt features matter most for carrying heavy camera gear?
Look for a hip belt with at least 5cm of foam thickness, a load-lifter angle adjustment, and a stiffened internal frame sheet that transfers weight directly to the belt instead of letting it sag onto your lumbar spine. Belt pockets sized for a light meter and a spare film back are a bonus — keeping frequently-grabbed items at hip level cuts your shoot-setup time by 30 seconds per frame.
Should I get a roll-top or zippered closure for a film photography hiking pack?
Roll-tops win for weatherproofing and expandability, but zippered closures win for organization and quick access to specific compartments. For a multi-day film shoot where you're loading and unloading the pack frequently, zippers save real time. For a single-push backcountry trip in unpredictable weather, a roll-top with a panel-access zipper for the camera compartment gives you the best of both.
How heavy is too heavy for a single-day Hasselblad hiking kit?
Most fitness research suggests a loaded pack should stay under 20% of body weight for a sustainable all-day pace. For a 75 kg photographer that's 15 kg total, leaving roughly 11-12 kg for camera gear after pack, water, and food. A V-system kit with body, three lenses, four film backs, light meter, and a carbon tripod lands around 8-9 kg — comfortably inside that envelope. An H6D kit with three lenses pushes 11-12 kg and starts to bite on long days.
Do I need a dedicated camera insert or can I use a standard hiking pack?
For a Hasselblad, you need real protection — at minimum a padded camera cube that drops into a standard hiking pack. Brands like F-Stop and Shimoda make modular inserts (ICUs and Core Units) sized to fit hiking packs in the 40-70L range. This setup actually outperforms most dedicated photo packs because you get a real backpacking suspension with the protection of a purpose-built camera compartment.
Key Takeaways
- Choosing the right hiking backpack for medium format film photographers means matching capacity and output ports to your actual devices
- Always check actual watt-hours (Wh), not just watts — runtime depends on Wh, not peak output
- Also covers: hasselblad hiking daypack
- Also covers: medium format camera backpack
- Also covers: 120 film carry pack
- Compare price-per-Wh across models to find the best value for your budget