Choosing the right hiking backpack for type 1 diabetics comes down to four non-negotiables: a tubing-friendly pump pocket positioned for easy bolusing, insulated compartments that keep insulin stable in heat and cold, hip-belt access to glucose tabs and a CGM reader, and a hydration system you can reach without dropping the pack. In 2026, the best options blend ultralight trail-running design with thoughtful medical storage. Below we break down the exact features to look for, the trade-offs between top-loaders and panel-loaders for pump users, and the trekking poles that pair best with a med-loaded pack for added stability on uneven terrain.
What makes a hiking backpack diabetes-friendly in 2026
Top Picks


A general-purpose daypack will technically carry your supplies, but it will not protect insulin from a 95°F summer ridge or give you a way to bolus without stopping the group. The category of a true hiking backpack for type 1 diabetics has matured fast over the last two years, and there are now five features you should treat as a baseline rather than a luxury.
- Insulated insulin sleeve. Look for a removable, foil-lined or neoprene sleeve sized for at least one Frio-style cooling pouch plus a backup pen or vial. Bonus points for a side-zip so you do not have to dig through the main compartment when temperatures spike at altitude.
- Pump tubing pass-through. If you wear an Omnipod, Tandem, or Medtronic 780G, a small grommet or sleeve port at the shoulder strap lets your tubing exit the pack cleanly. Without it, you will be threading tubing through zippers, which is how patch cannulas get yanked on a scramble.
- Hip-belt CGM and glucose access. Stretch mesh pockets on both hip-belt wings should hold a Dexcom G7 receiver or your phone on one side and a sleeve of glucose tabs on the other. You should be able to reach both without breaking stride.
- External hydration plus electrolyte bottle pockets. A 2L bladder is non-negotiable for blood sugar management, but you also want twin side bottles for an electrolyte mix that does not require touching your pump.
- Trekking pole loops or quivers. Hands-free hiking is more important when you wear a pump than people realize: poles take the load off your knees, reduce hypo-inducing exertion spikes, and free your hands when you need to dose mid-trail.
Why insulin pump access changes the backpack equation
Most outdoor-pack reviews assume the wearer never opens the pack between trailhead and lunch. T1D users open theirs constantly. That single behavioral difference cascades into design. Roll-top closures, while elegant for keeping rain out, are a nightmare when you need to bolus eight times during a 14-mile day on the Wonderland Trail. Panel-loading or U-zip designs win for pump users in 2026 because they let you flop the front open, expose your kit, and zip back up in fifteen seconds.
For tubed pumps specifically, pay attention to where the shoulder strap padding ends. If padding runs the full length, your tubing has nowhere to exit and you will end up with the pump clipped awkwardly to your sternum strap. The best diabetes-aware packs in 2026 use a split-pad design or a dedicated mesh port at the collarbone. If you wear an Omnipod or Mobi, that port becomes a sensor cable channel for CGM transmitters mounted on the upper arm.
Capacity and fit: matching the pack to the mission
A 16-22L vest-style pack handles a half-day local hike where you only need one backup site change. A 28-36L daypack covers full alpine days where you carry a meter, two pens, glucagon, snacks for three lows, and a layer system. For overnight or hut-to-hut trips, jump to a 45-55L with a true frame so the insulated compartment does not get compressed against trekking gear.
Women-specific or smaller-torso fits matter more for diabetics than for the average hiker, because the hip belt has to actually sit on the iliac crest for the CGM and glucose pockets to be reachable. A pack that rides high turns your hip-belt pockets into chest pockets you cannot see into—useless during a hypo.

Trekking poles are essential gear for T1D hikers
Trekking poles deserve a dedicated section because they directly affect blood glucose stability. By transferring roughly 20-25% of effort to your upper body, poles flatten the exertion spikes that drive lows on long descents and even out the slow climbs that push you high. They also free you to fish a juice box out of your hip belt without losing balance on scree. Every diabetic hiker should pair their pack with a set, and the three options below all clip cleanly to external pole loops on the packs we recommend in our guide to insulated cooler-pocket daypacks.
Comparison: trekking poles for T1D hikers in 2026
| Pole | Material | Style | Packed length | Best for |
|---|---|---|---|---|
| Nordic 7075 Aluminum | 7075 aluminum | Telescoping | ~26 in | All-day alpine + mixed terrain |
| TREKOLOGY Trek-Z Cork | Aluminum | Z-fold collapsible | ~15 in | Trail running + ultralight kits |
| Collapsible 2-Pack | Aluminum | Telescoping | ~25 in | Budget setups + spares |
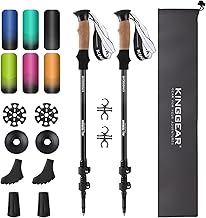
Best all-around pole for T1D day hikes: Nordic Lightweight 7075 Aluminum Trekking Poles
The Nordic 7075 aluminum poles hit the sweet spot for diabetic hikers who want one set that handles everything from a 6-mile state-park loop to a 14er attempt. The 7075 alloy is the same grade used in aircraft structural parts, which means you get carbon-fiber-rivaling stiffness at a price that does not make you cry if a pole catches in scree. The flick-locks adjust one-handed, which matters when your other hand is holding a glucose tab. Pair them with the hip-belt-pocket pack of your choice and you will notice your post-hike CGM trace flattens within the first month. Check current price on Amazon.
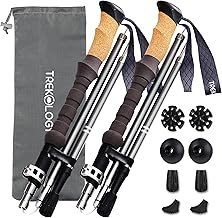
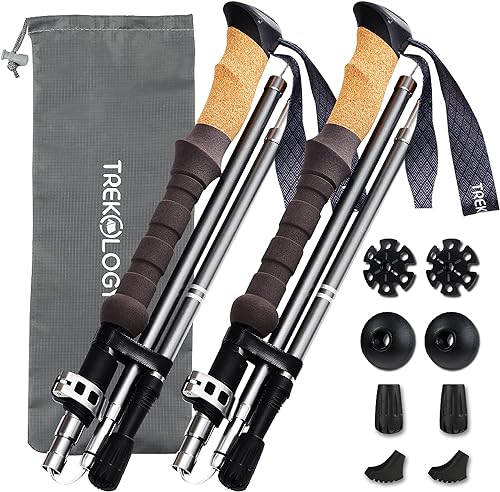
Best ultralight pole for trail-running diabetics: TREKOLOGY Trek-Z Cork Grip Folding Trekking Poles
If you straddle the line between fast-packing and trail running, the Trek-Z folds down to roughly 15 inches and slips inside a vest-style pack's main compartment alongside your insulin kit. Cork grips wick sweat—important when your hands carry CGM adhesive and you do not want skin oils degrading the seal—and the Z-fold mechanism deploys with a single yank so you can stash them when scrambling and redeploy at the next descent. For trail runners using an Omnipod or a Mobi, the low pack weight matters because every gram counts toward avoiding exertion-driven lows. Check current price on Amazon.
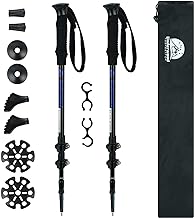
Best budget backup: Collapsible Aluminum Trekking Poles, 2-Pack
Keep a spare set in your car or trailhead bin. The 2-pack collapsible poles are the ones we recommend as a backup—cheap enough that lending them to a hiking partner does not sting, and durable enough for casual weekenders. Diabetic hikers tend to lend gear constantly because newcomers do not understand the stability dividend until they try it, and having a loaner set in the trunk keeps your premium poles on your own pack. Check current price on Amazon.
Packing the pack: a T1D-specific load order
The order in which you pack matters as much as the pack itself. Use this load order, top to bottom, for the main compartment:
- Bolus kit on top in a clearly labeled stuff sack: backup pump infusion set, IV Prep wipe, syringe, alcohol swab.
- Insulated insulin sleeve mid-pack against your back, where temperatures stay closest to ambient body heat in cold and shaded in sun.
- Snacks and electrolyte mix in a side pocket you can reach without removing the pack.
- Glucagon (Baqsimi or Gvoke HypoPen) in the lid pocket so a hiking partner can find it without unzipping the main compartment.
- CGM backup sensor + receiver charger in a small dry bag at the bottom—you will only need it if something fails.
- Phone in hip-belt pocket on the opposite side from your glucose tabs, so muscle memory keeps them straight.
Our companion piece on trail-running essentials for diabetics covers vest-style packing for shorter outings where this 6-step load gets compressed to 3 zones.
Heat, cold, and insulin stability on trail
Insulin starts degrading above 86°F and freezes below 36°F. Both happen on a single Sierra day hike in June. A Frio-style evaporative cooling pouch handles heat for 45 hours per soak and weighs under 3 ounces. For cold, the trick is keeping the insulin sleeve against your back rather than in an outer pocket—your body acts as the warmer. If you are winter hiking, slip a chemical hand warmer into the same sleeve, but wrap it in a sock so it cannot make direct contact with the vial or pump cartridge.
Sun exposure on the pack itself is sneaky. A black pack on a granite slab can hit 130°F surface temperature in July. Light-colored or reflective pack fabrics make a measurable difference. If your pack is dark, drape a sun shirt over it at lunch stops.
Frequently Asked Questions
What size hiking backpack do I need if I carry an insulin pump and CGM supplies?
For a half-day local hike, a 16-22L vest or daypack covers your kit. For a full alpine day with backup pens, glucagon, and a layer system, step up to 28-36L. Multi-day hut trips need 45-55L to fit overnight gear without compressing the insulated insulin sleeve.
How do I keep my insulin from overheating in a hiking backpack in summer?
Use a Frio-style evaporative cooling pouch inside an insulated sleeve, position the sleeve against your back rather than in an outer pocket, and choose a light-colored pack fabric. Avoid placing the pump or vial in direct sun during lunch stops—drape a layer over the pack.
Can I wear a hydration vest with a tubed insulin pump?
Yes, but choose a vest with split chest padding or a dedicated tubing port at the collarbone. Clip your pump to the sternum strap or a front pocket, and route tubing along the strap so it does not get caught when you remove the vest at breaks.
Where should I store glucose tabs on a hiking backpack for quick hypoglycemia treatment?
Always in a hip-belt mesh pocket on your dominant-hand side. You should be able to reach in one-handed without removing the pack, breaking stride, or even looking down. Keep a backup sleeve in the lid pocket and never bury them in the main compartment.
Do trekking poles really help diabetics on day hikes?
Yes. Poles transfer 20-25% of effort to your upper body, smoothing the exertion spikes that drive exercise-induced lows on descents and reducing knee impact that can sour an otherwise great glucose day. They also free a hand for mid-stride glucose checks. Read our CGM-friendly hiking gear guide for a deeper look at pairing poles with sensors.
How do I protect my CGM sensor from backpack strap rubbing?
Place the sensor on the back of your upper arm or thigh rather than the abdomen if strap rubbing is an issue. Apply a Skin Tac wipe and an overpatch before the hike, and adjust the shoulder strap so the load-lifters carry weight off the sensor zone. A sternum strap that sits low also keeps the shoulder strap from migrating.
Is a roll-top or zippered backpack better for type 1 diabetics?
Zippered panel-loaders win for T1D hikers because you open the pack many times per day to bolus, check sites, or grab snacks. Roll-tops are great for waterproofing but slow you down. If you want both, look for a hybrid with a roll-top main compartment and a zippered front panel for med access.
Putting it all together
The right hiking backpack for type 1 diabetics is the one that disappears on your back, opens fast when you need it, and protects your insulin from the conditions you actually hike in. Pair it with a set of poles sized to your terrain, load it in the T1D-specific order above, and you will spend the trail thinking about views instead of about your CGM. Start with the panel-loading daypack that fits your torso, add the Nordic 7075 poles for all-around terrain or the Trek-Z folders for fast-and-light, and keep the 2-pack collapsibles as your loaner-and-spare set. In 2026, there is no longer any reason to compromise between mountain capability and pump-friendly design—you can have both, and your A1C will thank you for it.
Key Takeaways
- Choosing the right hiking backpack for type 1 diabetics means matching capacity and output ports to your actual devices
- Always check actual watt-hours (Wh), not just watts — runtime depends on Wh, not peak output
- Also covers: insulin pump friendly daypack
- Also covers: diabetes hiking gear storage
- Also covers: cgm sensor accessible pack
- Compare price-per-Wh across models to find the best value for your budget